All posts by Sam Fisher

Flood-UI and Rtorrent on Ubuntu 18.04/16.04

I was bored yesterday and googled “best bittorrent web client” and eventually stumbled onto Flood-UI – it’s a nice modern webui for rtorrent. You can find multiple screenshots of it here. I followed this guide but I had to make some changes for it work on my seedbox; most of the instructions below are taken from the guide I used.

Install rtorrent, setup a user to run rtorrent and make an rtorrent config file:

Paste the following into .rtorrent.rc; you can customize the ports you want to use for rtorrent here:

Create the directories as specified in the above config file for rtorrent; I couldn’t think of a better place to put everything so I just used the paths in the guide.

Create a systemd script for rtorrent:

Give it the following contents:

Enable and start the rtorrent service:

This is where I had to deviate from the guide I was using and install Node.JS/Flood differently; when I followed the guide as is I couldn’t get Flood to build/install correctly. After fixing that issue, I noticed files wouldn’t get deleted when removing torrents (even with the option checked to delete files); the solution to this was to just run both rtorrent and Flood as the same user.

My seedbox didn’t have git or curl installed so I installed those first:

Next I installed the latest version of Node.JS following this guide:

I also needed to install gcc g++ and make:

Next clone the repo from Git and make a config file for Flood. Per the official documentation you should edit config.js and change the secret value to something long and unique (the default value is flood). If you run into permission errors while running git or npm, try changing ownership of /srv/torrent to your user before you run those commands. I had to do this when I tried to repeat this guide on a new box where I wasn’t logged in as root; just remember to give ownership back to rtorrent when finished.

Next install Flood:

Give our previously created user permissions to run flood:

Create a systemd script for Flood:

Give it the following contents:

Enable and start the Flood service:

Flood and rtorrent should be running at this point; the default port for Flood is 3000. Since I already had nginx configured as a reverse proxy for the Deluge WebUI, I just edited my nginx config to point to Flood instead. The official documentation has additional details on using Flood behind a reverse proxy here. If you are going to access Flood directly by IP, you may need to edit config.js and update the floodServerHost and floodServerProxy to the IP address of your server.

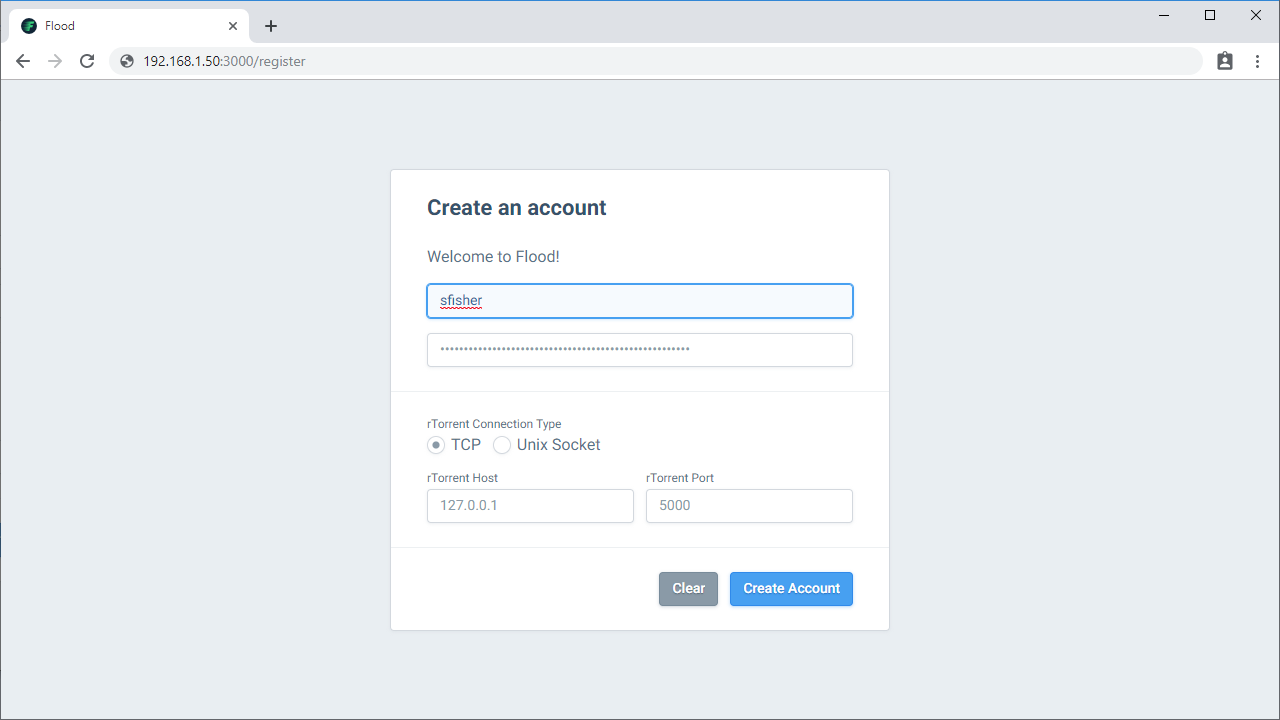
When logging into Flood for the first time, you will need to register; pick your username/password and provide the IP and Port for rtorrent:

Vlmcsd on Ubuntu 18.04

vlmcsd is an open source KMS emulator that can run on a variety of CPU architectures and operating systems.  You can find it officially on the My Digital Life forum (registration required) although at least one other person has mirrored it on GitHub. I’ve been running it for the past few months on my Skull Canyon NUC running Ubuntu 18.04; below are instructions to get it running as a service.

The easiest way to download is through Github. I also renamed the binary to just vlmcsd to make it simpler and copied it to /usr/local/bin:

Make a user to run vlmcsd as a service and give the user permissions on the binary:

Create a systemd script:

Give it the following contents:

Make a folder under /var/log for logging and give the vlmcsd user permissions:

Now you just need to enable and start the service:

Check the status of the service:

If all goes well, you should see output similar to below:

To activate a product like Office 2016 against this KMS emulator, you can use the ospp.vbs script located in your Office installation folder:

Sega Dreamcast – picoPSU, Battery Holder and Controller Fuse Mods

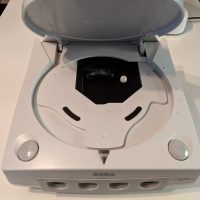
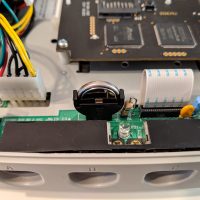
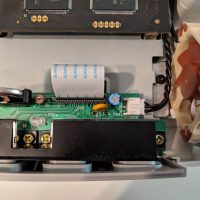
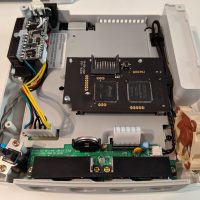
Last summer I modded my Dreamcast with a GDEMU and Noctua fan; I decided it was a good time to throw in a few more mods: a new power supply, battery holder, controller fuse and a 3D printed insert for the GDEMU.

Replacing the original power supply is generally recommended when you remove the optical drive to install the GDEMU or USB-GDROM; supposedly the power supply runs hotter because the 12 V rail is no longer loaded by the optical drive. There are a few ways to go about replacing the Dreamcast power supply:

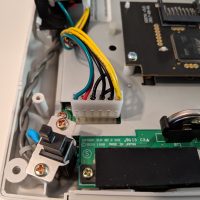
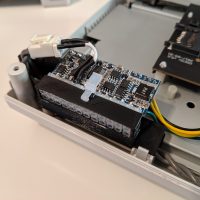
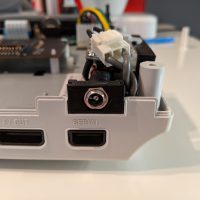
I found an eBay seller offering pre-modded picoPSUs for the Dreamcast; they even include a 3D printed bracket to secure the unit in the same place as the original power supply. I went with this option since it was the most complete solution and required the least amount of work.

A 12 V DC power adapter is also needed to drive the picoPSU. Most recommendations are for one that can output 2 A to 5 A; you can find tons of generic wall warts and power bricks that meet this criteria on Amazon and eBay. I wanted the best one so it was hard deciding which of these generic power adapters to buy. Luckily I found a Seasonic power adapter that works perfectly for the Dreamcast picoPSU mod: the Seasonic SSA-0601HE-12. It’s rated for 12 V 5 A and has the correct barrel connector for the picoPSU (2.5mm, center positive). Seasonic is known as one of the best PC power supply manufacturers; based on Seasonic’s reputation alone, I’m going to say that this is the best power adapter for the Dreamcast picoPSU mod.

Installing a GDEMU leaves a lot of empty space in the drive tray and SD cards can drop out of reach during swaps. I bought a 3D printed insert that fills the void and came with an SD card extender; the insert gives the Dreamcast a nicer look and makes it easier to swap SD cards. The insert can be purchased from this eBay seller.

Years ago I modded my Dreamcast to use eneloop batteries instead of the built-in rechargeable battery. It works but doesn’t seem to last as long as you would think despite the capacity being several times greater. I removed the eneloops and installed a button cell battery holder and ML2032 battery for a cleaner look. I ordered the holder from Amazon and the battery from eBay but you can also find them bundled together on eBay like this.

The Dreamcast suffers from a common issue where controllers stop working because of a blown fuse although mine has never had this problem. I replaced it anyway with a PolySwitch 72V 400mA fuse from Amazon. This fuse can be reset by turning the Dreamcast off and on again. It’s a simple mod to perform; just swap the old fuse (labeled as F1) on the controller board with the PolySwitch. You can find a detailed guide on this mod here.

This is now the coolest Dreamcast I own; the only thing it’s missing is a DCHDMI. Fortunately I’ve already got a VGA box and OSSC.

MacOS Mojave – Reset and Lock Size of Dock

I like keeping the macOS Dock at the default size but sometimes I fat-finger with the trackpad and accidentally resize. It’s a shame there is no obvious way to change it back to the default. Fortunately someone figured out the default value of the dock size; you can restore the size with the following command:

You can also disable resizing entirely with:


Logitech G900 Battery Upgrade

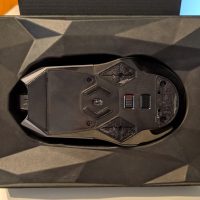
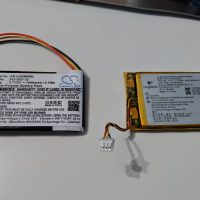
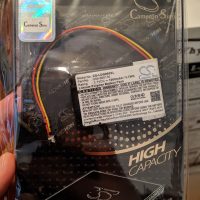
I found an upgraded battery for my Logitech G900 mouse and it has been working well for the past 2 months. The new battery has a capacity of 1000 mAh vs the original’s 750 mAh; it does seem to last longer on a single charge even though the Logitech Gaming Software still reports the same amount of running time (in my case, 25 hours with my lighting settings). The software is probably hard-coded for the original 750 mAh battery; I’ve noticed when the mouse is down to 20%, the software will continue to report there is 20% remaining for a few more hours before it continues to drop.

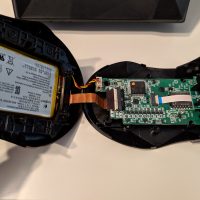
Opening the G900 is fairly straight forward; there is one T5 Torx screw by the micro-usb port and six 00 Phillips screws under some of the feet. I highly recommend purchasing a set of replacement feet rather than trying to reuse the ones you pull off. Be very careful when opening the G900 after removing the screws; there is a delicate ribbon cable connecting the two halves of the mouse as you can see below. You’ll want to disconnect the ribbon cable from the bottom half so you don’t accidentally rip it when you work on disconnecting and removing the battery. The battery is secured with double-sided tape so it will take some time to pry it out gently. The replacement battery has much longer leads but with some care it will all fit back inside.

Windows 10 – Most Used List Not Updating

Some time after building my emulation PC I noticed the “Most used” list in the Start Menu only ever displayed the default MS apps, even after a clean install of Win10. The most common programs launched on that PC are RetroArch, Launchbox and Steam yet none of them appeared in the list.

Searching on Google mostly yielded results of people complaining about it but no real solutions. Eventually I found a solution at the bottom of this thread – basically boils down to making another language the default in Windows and then switching back to your original language setting. Somehow this resets the list and allows it to update correctly.

  1. Go to Start Menu > Settings > Time & Language > Region & Language
  2. Click on Add a language > search and add another language (preferably one you can actually read…) installing the default options.
  3. Make the new language your default and reboot.
  4. After rebooting, go back to Start Menu > Settings > Time & Language as before and change your default language back to the original and remove the language you added in step 2.

After performing these steps, the “Most used” list should be populated with new apps after a few launches. I originally did this fix on Windows 10 1803 and my “Most used” list still accurately reflects app usage even after upgrading to 1809. Hopefully this bug doesn’t exist anymore but it’s worth giving the above steps a try if you stumble on this post while using a future build of Win10.

Failed to Run Task Sequence – 0x8007000f

Recently I needed to image several laptops; it worked fine the first day but the next day imaging was unsuccessful with every laptop showing the “Failed to Run Task Sequence” message with error code 0x8007000F. This was a new SCCM environment for me and I decided to google the error code to see what I could find. Funny enough I found a temp solution on a blog that uses the same base theme as this site (WordPress Twenty Fourteen). Error code 0x8007000F means the imaging environment is unable to find/format the disk properly before applying the image.

Using the above commands to manually format/partition the drive in each laptop helped me get the imaging working; the true solution was for the SCCM admin to rollback the image to a previous version as these commands shouldn’t be necessary.

RetroArch – Convert PlayStation 1 BIN/CUE to CHD

Update 6/3/2021: Google Search Console tells me this page is getting popular lately. While I originally wrote this with PSX games in mind, you can apply it to most other CD based consoles. I’ve also converted Sega CD, Sega Saturn and Turbo Duo CD games from BIN/CUE to CHD for use in RetroArch.

The Redump set for PlayStation 1 USA is about 385GB (just the games, no demo/samplers etc) 512GB in 7zip format; 7zip is not supported by the Beetle PSX core so when I originally added the PSX library to my Launchbox/RetroArch setup I just extracted every game. This took up a significant portion of the 1TB drive I was using to store all ROMs; additionally Redump uses separate BIN files for every track on the CD so a single game would have multiple BIN files plus the CUE. I found by accident an old Reddit post where I learned that you can compress BIN/CUE into Mame’s CHD format which is supported by the Beetle PSX core; the result is you will have a single compressed file for each PSX game that is comparable to the original 7zip in size and directly playable.

To do this conversion you need chdman.exe which can be found inside the MAME Official Windows Binary packages located heremame0201b_64bit.exe was the latest release when I did the conversion.

Extract chdman.exe from mame0201b_64bit.exe into the same folder as your PSX BIN/CUE files. Then you can just run one command to convert everything to CHD:

Expect this to run for a long time; on the Redump set, this conversion took about 1.5 days on an i7-4770K and a 2.5″ 1TB Seagate FireCuda hybrid drive. You should also have free space equal to at least 1.5x the size of the Redump set before running the command Just make sure you have plenty of free disk space as this process will create new CHD files in addition to all the BIN/CUE files.