I was bored yesterday and googled “best bittorrent web client” and eventually stumbled onto Flood-UI – it’s a nice modern webui for rtorrent. You can find multiple screenshots of it here. I followed this guide but I had to make some changes for it work on my seedbox; most of the instructions below are taken from the guide I used.
Install rtorrent, setup a user to run rtorrent and make an rtorrent config file:
|
1 2 3 |
sudo apt-get install rtorrent sudo adduser --disabled-password rtorrent sudo vi /home/rtorrent/.rtorrent.rc |
Paste the following into .rtorrent.rc; you can customize the ports you want to use for rtorrent here:
|
1 2 3 4 5 6 7 8 9 10 11 12 13 14 15 16 17 18 19 |
# Where rTorrent saves the downloaded files directory = /srv/torrent/downloads # Where rTorrent saves the session session = /srv/torrent/.session # Which ports rTorrent can use (Make sure to open them in your router) port_range = 50000-50000 port_random = no # Check the hash after the end of the download check_hash = yes # Enable DHT (for torrents without trackers) dht = auto dht_port = 6881 peer_exchange = yes # Authorize UDP trackers use_udp_trackers = yes # Enable encryption when possible encryption = allow_incoming,try_outgoing,enable_retry # SCGI port, used to communicate with Flood scgi_port = 127.0.0.1:5000 |
Create the directories as specified in the above config file for rtorrent; I couldn’t think of a better place to put everything so I just used the paths in the guide.
|
1 2 3 4 5 6 |
sudo mkdir /srv/torrent sudo mkdir /srv/torrent/downloads sudo mkdir /srv/torrent/.session sudo chmod 775 -R /srv/torrent sudo chown rtorrent:rtorrent -R /srv/torrent sudo chown rtorrent:rtorrent /home/rtorrent/.rtorrent.rc |
Create a systemd script for rtorrent:
|
1 |
sudo vi /etc/systemd/system/rtorrent.service |
Give it the following contents:
|
1 2 3 4 5 6 7 8 9 10 11 12 |
[Unit] Description=rTorrent After=network.target [Service] User=rtorrent Type=forking KillMode=none ExecStart=/usr/bin/screen -d -m -fa -S rtorrent /usr/bin/rtorrent ExecStop=/usr/bin/killall -w -s 2 /usr/bin/rtorrent WorkingDirectory=%h [Install] WantedBy=default.target |
Enable and start the rtorrent service:
|
1 2 |
sudo systemctl enable rtorrent.service sudo systemctl start rtorrent |
This is where I had to deviate from the guide I was using and install Node.JS/Flood differently; when I followed the guide as is I couldn’t get Flood to build/install correctly. After fixing that issue, I noticed files wouldn’t get deleted when removing torrents (even with the option checked to delete files); the solution to this was to just run both rtorrent and Flood as the same user.
My seedbox didn’t have git or curl installed so I installed those first:
|
1 |
sudo apt-get install git curl |
Next I installed the latest version of Node.JS following this guide:
|
1 2 |
curl -sL https://deb.nodesource.com/setup_12.x | sudo -E bash - sudo apt-get install -y nodejs |
I also needed to install gcc g++ and make:
|
1 |
sudo apt-get install gcc g++ make |
Next clone the repo from Git and make a config file for Flood. Per the official documentation you should edit config.js and change the secret value to something long and unique (the default value is flood). If you run into permission errors while running git or npm, try changing ownership of /srv/torrent to your user before you run those commands. I had to do this when I tried to repeat this guide on a new box where I wasn’t logged in as root; just remember to give ownership back to rtorrent when finished.
|
1 2 3 4 |
cd /srv/torrent git clone https://github.com/jfurrow/flood.git cd flood cp config.template.js config.js |
Next install Flood:
|
1 2 |
npm install npm run build |
Give our previously created user permissions to run flood:
|
1 |
sudo chown -R rtorrent:rtorrent /srv/torrent/flood/ |
Create a systemd script for Flood:
|
1 |
sudo vi /etc/systemd/system/flood.service |
Give it the following contents:
|
1 2 3 4 5 6 7 8 9 10 11 12 |
[Service] WorkingDirectory=/srv/torrent/flood ExecStart=/usr/bin/npm start Restart=always StandardOutput=syslog StandardError=syslog SyslogIdentifier=notell User=rtorrent Group=rtorrent Environment=NODE_ENV=production [Install] WantedBy=multi-user.target |
Enable and start the Flood service:
|
1 2 |
sudo systemctl enable flood sudo systemctl start flood |
Flood and rtorrent should be running at this point; the default port for Flood is 3000. Since I already had nginx configured as a reverse proxy for the Deluge WebUI, I just edited my nginx config to point to Flood instead. The official documentation has additional details on using Flood behind a reverse proxy here. If you are going to access Flood directly by IP, you may need to edit config.js and update the floodServerHost and floodServerProxy to the IP address of your server.
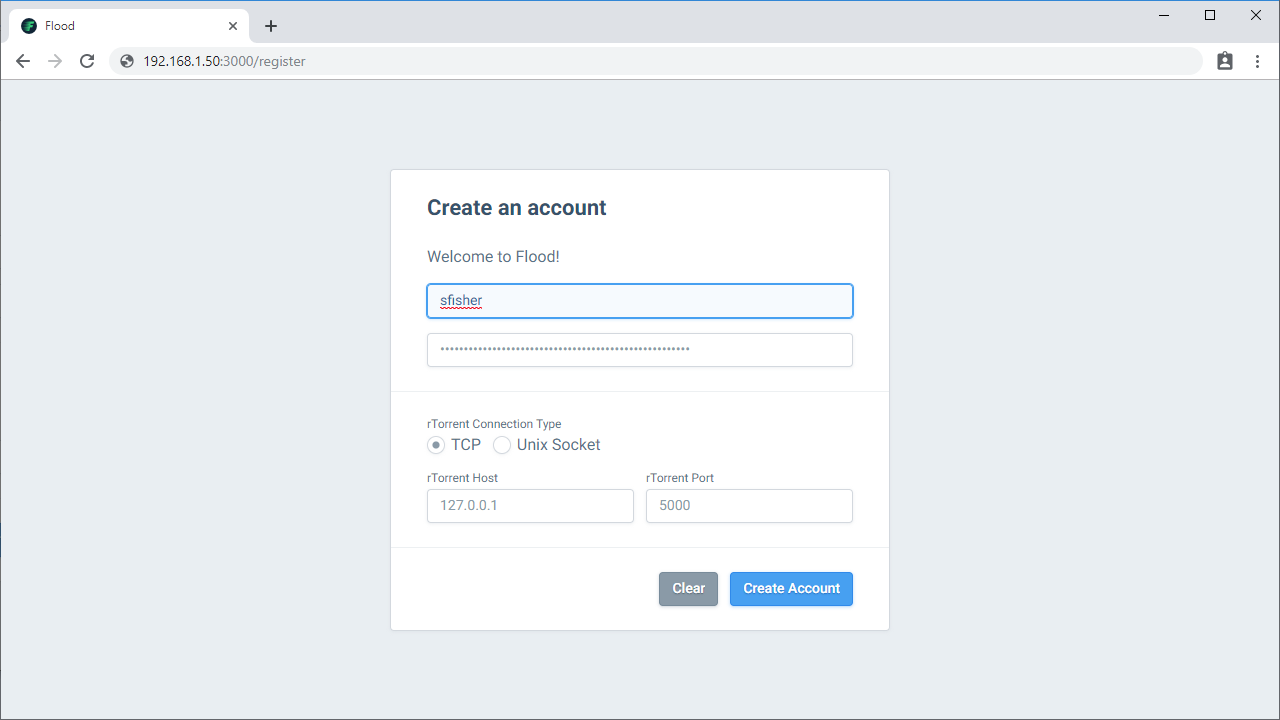
When logging into Flood for the first time, you will need to register; pick your username/password and provide the IP and Port for rtorrent: