Category Archives: PC peripherals

Logitech G Pro Wireless Double-Click Fix – Replace the Switches

Somehow my post on replacing G900/G903 switches became my most popular page according to the Google Search Console; depending on the query it’s even on the first page of Google results. If you’re new to the infamous double-click issue on Logitech mice, the TL;DR is that the stock Omron switches are garbage and you should replace them with better ones.

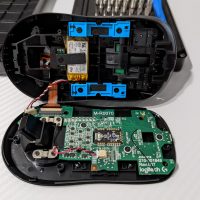
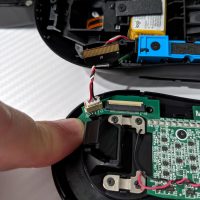
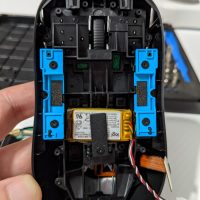
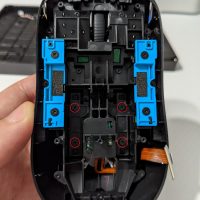
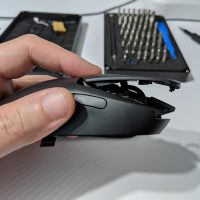
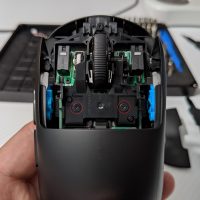
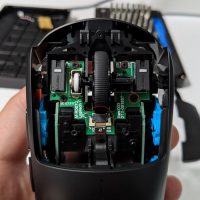
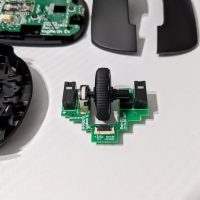
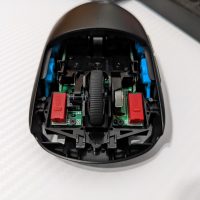
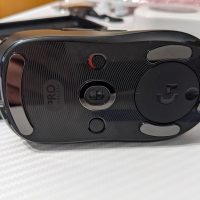
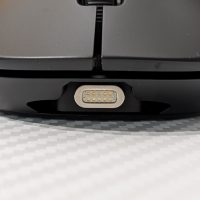
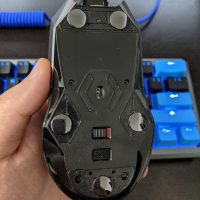
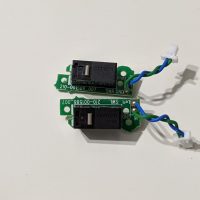
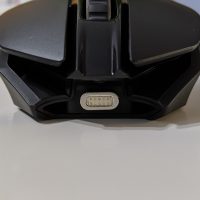
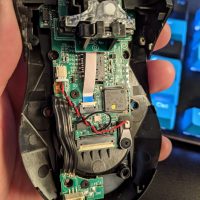
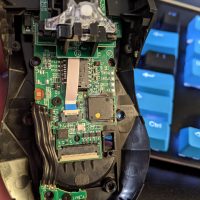
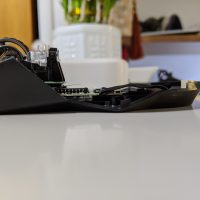
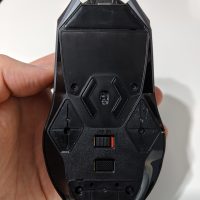
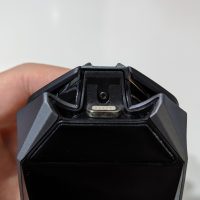
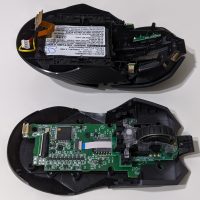
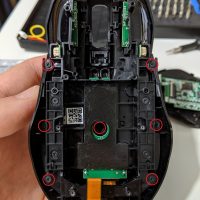
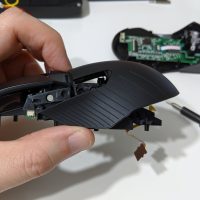
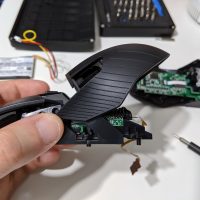
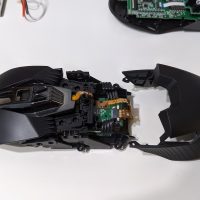
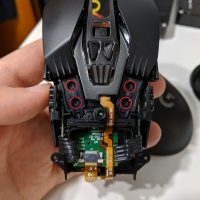
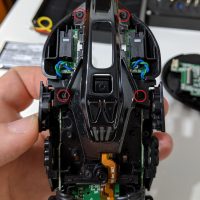
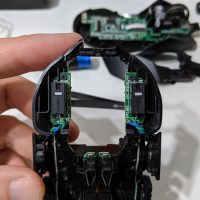
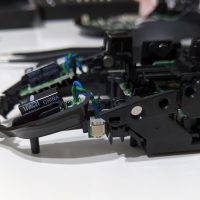
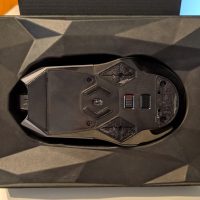
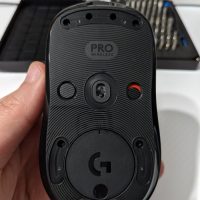
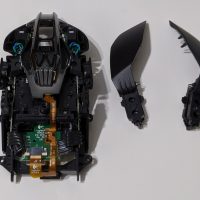
Since I’ve recently switched from the G903 Hero to the GPW, I thought I’d do a similar write-up on how to do a partial teardown. Mine’s been modded with Kailh GM 4.0 switches, Kailh 8mm rotary encoder, Ceramic Mouse Skates and NetDot Magnetic Micro-USB Adapter.

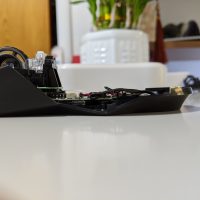
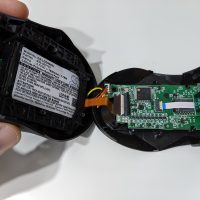
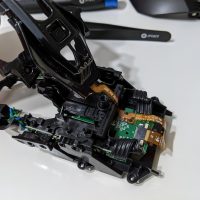
The GPW is much easier to open up compared to the G900/G903; you can get to the main PCB for the left/right/middle switches and mouse wheel encoder without tearing the mouse apart completely. Here’s a few YouTube videos that detail tearing down the GPW:

These videos and the gallery below should help you in disassembling your GPW to upgrade the switches. Pro tip: the iFixit iOpener is really useful for removing mouse feet cleanly but I would recommend having an extra set just in case.

Building a Better Mouse Continued: Ceramic Mouse Feet and 2200 mAh Battery Life

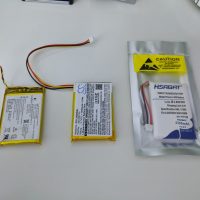
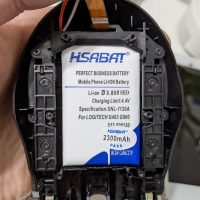
A few months ago I put together a mod list for the G900/G903 which included a 2200 mAh battery I found on Aliexpress (although it came with a sticker that said 2300 mAh). I charged the battery to full on September 12th and took a screenshot of the battery life as measured by G Hub at the end of every week. There was 4% battery remaining on Nov 5th. I used the G903 with 1000 Hz polling rate and RGB on. Certainly not the most scientific testing but this battery seems like a good replacement for the original battery.

After playing around with a Model O Wireless and their ceramic G-Floats, I decided to give my G900/G903 the same kind of treatment. I’ve read conflicting information as to whether the Lexip ceramic feet work on the G903 or not but am happy to report that it does work on both the G900 and G903. The only issue I had was trying to position the Lexip feet in a way that keeps the mice perfectly level so it doesn’t wobble when clicking (apparently my mouse pad or desk isn’t perfectly flat). I ended up removing and repositioning the ceramic feet multiple times to get it right. At the time of this writing the cheapest place to buy Lexip ceramic feet is BestBuy (currently $9.99 USD).

Building a Better Mouse: Logitech G900/G903 Mod Parts

TLDR: Just go to the bottom if you want to see a list of parts you can buy to mod your G900/G903. See my older post or watch this video by Ents if you need guidance on taking one apart.

I’ve been using the Logitech G900 mouse since 2017; it has served me well especially after discovering how to upgrade the switches (although the G900 doesn’t seem to be as famous as the newer G903 models for double-clicking).

I’ve actually purchased the new G903 Hero on 3 separate occasions in an effort to get a “better” G900. When it was announced last summer, I preordered it for $149.99 – I used it for about a week before returning it to Logitech for a full refund. The battery life improvements from the new Hero sensor were fantastic; the battery life percentage barely dropped during that entire week. However this was before my journey into upgrading mice switches and I returned the G903 Hero because the clicks seemed too soft and middle mouse button barely had any tactile feedback. I went back to my trusty G900.

Three months ago, there was a sale on the G903 Hero on Amazon for $99.99 so I pulled the trigger on two of them. I planned to upgrade them with Omron Japan D2F-01 switches but both units had zero feedback on the middle mouse button. There was no tactility or any movement when you pressed down on the mouse wheel for middle mouse clicks. Disappointed, I returned both of them to Amazon for a full refund. About a week later, Best Buy had the G903SE on sale for $69.99; I decided to gamble on one of these since it was relatively cheap. The middle mouse on this worked just like my G900 but aside from the addition of PowerPlay charging, there was really nothing else this mouse offered over my G900.

About a month after that, my G900 middle mouse button started to double-click. Eventually I ended up going down the rabbit hole that is Aliexpress shopping; I found just about every part inside the G900 for sale including the entire PCB that contains the middle mouse button. I fixed the middle mouse click on my G900 with that part and then realized I could also fix the middle mouse on the new G903 Hero models…

Last week, Amazon had the G903 Hero on sale again for $99.99 so I ordered it again (just one this time). To my surprise, this G903 Hero had a proper middle mouse button and worked just like my old G900; sharp responsive tactile feedback. Only took three attempts and four units to get a proper one. Now that I had a G903 Hero that passed quality control properly, I went to work on modding it to my liking. Below is a list of parts you may be interested in if you like the G900/G903 mouse as much as I do.

Switches

  • Omron Japan D2F-01 – heavy switch with operating force of 150gf. This is my favorite switch for the G900/G903.
  • Omron Japan D2F-01F – light switch with operating force of 75gf according to the manufacturer; Ents rates it closer to 55gf.
  • Kailh GM 4.0 – popular heavy switch that I use for other mice; feels lighter than the D2F-01 when used in the G900/G903.

Power

  • Replacement Batteries: 1000mAh and 2200mAh – I’ve had the 1000mAh battery in my G900 for the past year and it works as least as well as stock. I just put the 2200mAh one into my G903 Hero so I can’t comment on its reliability (EDIT: battery life seems pretty good, see this post). Both of these batteries are larger than the original so you will have issues closing up the G903 properly because of the added height from the PowerPlay charging components. I ripped all of that out to make the 2200mAh battery fit.
  • NetDot Magnetic Micro-USB adapters – a slick way to charge your G900/G903 – see it in action here. I use these with an Anker Powerline+ Micro USB cable and Anker PowerPort Mini.
  • WizGear Metal Mount Plate – this is a metal plate for those magnetic smartphone holders you put in your car. If you stick this plate on the back of your monitor, you can hide your charging cable out of sight with the NetDot adapter like this.

Spare Parts

  • Corepad Skatez for the G900 and G903 – 100% teflon replacement feet. Taking apart the G900/G903 requires ripping off the mouse feet. These are great replacements and glide faster than stock.
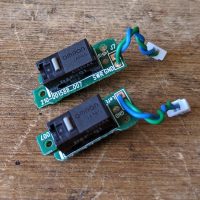
  • G900/G903 Mouse Wheel PCB – replacement PCB that includes the middle mouse button, rotary encoder and left/right horizontal scroll buttons. I used this to fix my G900’s middle mouse double-click.
  • G900/G903 Flex Cable – this connects the bottom PCB to the Mouse Wheel PCB in the top half of the mouse. It also contains the LED that lights the Logitech G logo on the back of the mouse. I ripped one of these by accident last year when I upgraded my G900’s battery.
  • G900/G903 side button PCB – replacement PCB that includes the left/right side buttons and DPI buttons on the top of the mouse. I bought a few extras of these but haven’t actually had to use them yet.

Glorious GMMK Full Size with Tai-Hao Keycaps and Kailh Box Navy Switches

My main keyboard since 2012 has been the Ducky Shine 2 with Green LEDs and Cherry MX Blues. During the holidays I ordered some switch testers from Amazon to play around with and my favorite switch was the Kailh Box Navy. This is a very loud tactile switch with a very heavy spring; it took some getting used to compared to my old Cherry MX Blues. It’s definitely not a switch for everyone and some may find it too tiring due to the amount of force required to activate each switch.

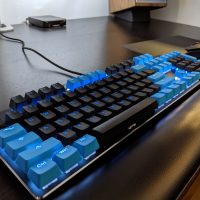
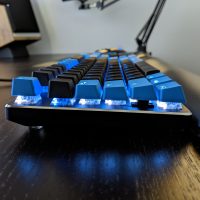
Since I had recently completed my Black x Blue 3950x, I wanted a new keyboard to try and match the same color scheme. I ended up buying the Glorious GMMK Full Size as it seems to be the cheapest option with all of the features I wanted: RGB backlighting, hotswappable switches, full size and can be purchased without keycaps or switches. I ordered Kailh Box Navy switches separately from Novelkeys and a Tai-Hao black/blue PBT backlit keycap set from MechanicalKeyboards.

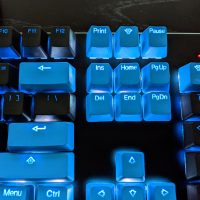
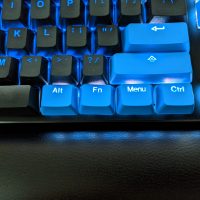
The Tai-Hao keycap set I bought has a rough matte texture that feels nice (to me) and is the only set I could find that was PBT, backlit and came in two colors (black/blue). Unfortunately the blue on this keycap set doesn’t match the blue on my Noctua Chromax fans but still looks pretty good. The only negative thing about this keycap set is the quality control; some of the keys are slightly off and some are very obviously crooked like the DEL and FN keycaps. I tried changing the switches under them but it appears to be a defect in the keycap alignment rather than the switch stem.

I’ve read mixed things about Glorious’s customer service but personally can only report a positive experience. I ordered my GMMK a few days before their end of year sale; I contacted support and they refunded me the difference (10%). The first GMMK I received was damaged in shipping (warped case); they sent me a replacement unit free of charge and didn’t even ask me to ship the old one back.

Overall I would say the GMMK is a good starter keyboard; experienced users will see the GMMK as a glorified switch tester. It doesn’t have the same build quality or heft to it as my Ducky Shine 2 or Vortex Pok3r RGB; bottoming out on some of the keys sounds a bit hollow on the GMMK as well. My next keyboard will probably be the Drop Shift or I will just build a custom YMDK96 from scratch. If you are shopping for your first mechanical keyboard, I recommend buying a switch tester to get an idea of what switch you like then getting the GMMK in the size you prefer.

Logitech G900/G903 Double-Click Fix – Replace the Switches

Update 9/14/20: The Google Search Console tells me this is my most popular page. You may also be interested in my post regarding mod parts for the G900/G903.

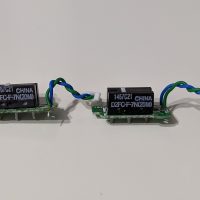
If you are still using a Logitech G900 or G903 mouse, I highly recommend replacing the switches with either the Omron D2F-01 or D2F-01-F. The D2F-01 has a higher actuation force which provides a more tactile and satisfying click than the original switch; personally this is what I’m using. The D2F-01-F has the same actuation force as the original if that’s what you prefer. The reason you’d want either of these switches is because both are Japanese Omron switches which are considered higher quality and more reliable than the original Chinese Omron switch (D2FC-F-7N). It seems the Logitech G903 and their newer mice are notorious for double-click issues; just Google it or take a look at the /r/LogitechG and /r/MouseReview subreddits. These YouTube videos go into great detail to explain why newer mice fail so often and cover different switch types: https://www.youtube.com/watch?v=v5BhECVlKJA and https://www.youtube.com/watch?v=NhhRTUrz0R8.

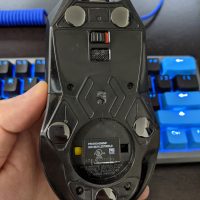
The Logitech G900/G903 isn’t too difficult to take apart but there are quite a few screws to keep track of and they are not all the same length. Be sure to have a spare set of replacement mouse feet since they must be removed in order to open the mouse. Here’s a list of YouTube videos that detail tearing down the Logitech G900/G903:

I also took some photos while taking apart my G900; hopefully all of this info will help you upgrade your mouse with new and better switches.

Logitech G900 Battery Upgrade

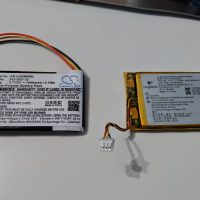
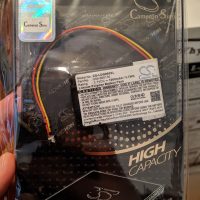
I found an upgraded battery for my Logitech G900 mouse and it has been working well for the past 2 months. The new battery has a capacity of 1000 mAh vs the original’s 750 mAh; it does seem to last longer on a single charge even though the Logitech Gaming Software still reports the same amount of running time (in my case, 25 hours with my lighting settings). The software is probably hard-coded for the original 750 mAh battery; I’ve noticed when the mouse is down to 20%, the software will continue to report there is 20% remaining for a few more hours before it continues to drop.

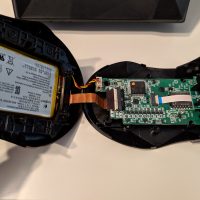
Opening the G900 is fairly straight forward; there is one T5 Torx screw by the micro-usb port and six 00 Phillips screws under some of the feet. I highly recommend purchasing a set of replacement feet rather than trying to reuse the ones you pull off. Be very careful when opening the G900 after removing the screws; there is a delicate ribbon cable connecting the two halves of the mouse as you can see below. You’ll want to disconnect the ribbon cable from the bottom half so you don’t accidentally rip it when you work on disconnecting and removing the battery. The battery is secured with double-sided tape so it will take some time to pry it out gently. The replacement battery has much longer leads but with some care it will all fit back inside.
8Bitdo SF30 Pro and SN30 Pro Controllers

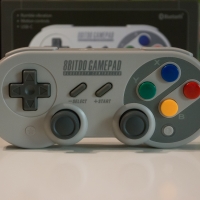
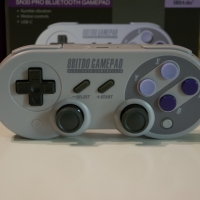
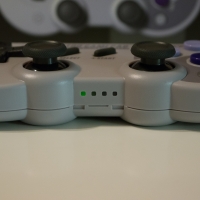
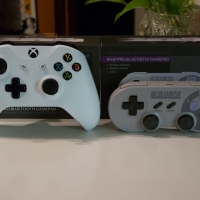
I’ve been working on a new emulator build using Windows, Launchbox, and Retroarch. For my controllers I’ve always used Qanba Q4RAF sticks for arcade games and Xbox 360 controllers for consoles. I decided it was time to upgrade the controllers to something newer so I decided to pick up the 8Bitdo SF30 Pro and SN30 Pro Controllers. They’re basically replicas of the old SNES controller in both the Super Nintendo (SN30 Pro) and Super Famicom (SF30 Pro) colors. You can find plenty of in-depth reviews of these controllers on YouTube or Google; overall I’m quite pleased with these controllers for emulation usage.

Some things I noticed:

  • Everyone says to update the firmware out of the box; my SF30 Pro was already v1.25 (newest at the time of this post) but my SN30 Pro was v1.22.
  • The D-Pad on my SN30 Pro feels more worn and isn’t as stiff as my SF30 Pro’s D-Pad.
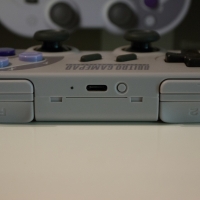
  • They pair quite easily with Windows 10 over Bluetooth; you can also use them wired (flat style USB-C cable is included)
  • You can pair both the SF30 Pro and SN30 Pro to your Windows PC for multiplayer games; they show up in Windows as “8Bitdo SF30 Pro” and “8Bitdo SN30 Pro” respectively. Not sure what happens if you have 2x SF30 Pros or 2x SN30 Pros since they share the same device name.
  • Works great with RetroArch; shows up as “Bluetooth XINPUT compatible input device”. If you have the SF30 Pro and SN30 Pro paired, then they will appear as “Bluetooth XINPUT compatible input device (#1)” and “Bluetooth XINPUT compatible input device (#2)”.

Voice Chat Overkill – Audio-Technica AT2020 USB

For a long time I was using my Logitech C920 as a microphone for voice chat during gaming sessions with my friends. While the mic quality is decent, it unfortunately picks up a lot of background sounds and even sounds from another room. After watching a lot of Twitch streamers with microphones attached on stands/arms, I decided to try one for myself. Why not a Gaming headset?  Because I’m using Beyerdynamic DT-990 600 ohm version on an Matrix M-Stage amplifier; switching between a pair of headphones for gaming/voice chat and another for everything else is just too cumbersome, not to mention the difference in sound quality.

My research led me to choose between two microphones: Blue Microphones Yeti and Audio-Technica AT2020 USB. Ultimately I decided to go with the AT2020 USB since its smaller and lighter than the Yeti; less distraction in the peripheral vision and also I could get away with using a lower quality mic arm like the Neewer Microphone Suspension Boom Scissor Arm Stand.

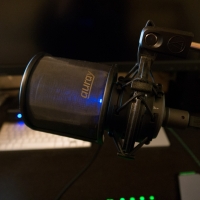
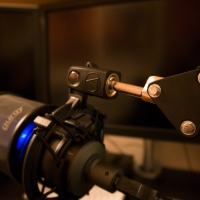
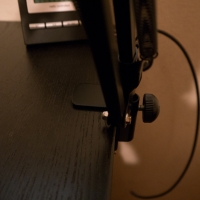
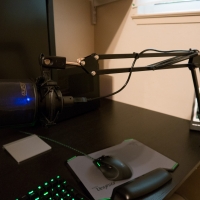
For approximately $15 USD, I can’t really complain about the quality of the stand. It holds the AT2020’s weight perfectly without any sag and is secured tightly to my desk via clamp. To attach the AT2020 to the Neewer stand I used Audio-Technica’s AT8458 Shock Mount and On-stage Screw Adapter. The Neewer comes with a plastic screw adapter which I found was too loose to hold the AT2020 in place; I used a piece of electrical tape wrapped around the screw threads to create a tighter fit until I found the On-stage adapter. The shock mount grips the AT2020 firmly and leaves enough space to use a curved pop filter like the Auray OMPF-33.

This setup is probably overkill for the occasional voice chat over Skype or Mumble but the sound quality is significantly greater than the C920’s microphone and picks up less background noises; you can find many videos on YouTube with example recordings of the AT2020.