
For the last couple of years I’ve been doing my retrogaming with a combination EmulationStation and RetroArch. At first I was using a Zotac mini PC for the hardware and Lubuntu for the OS; at the time I also used this PC to play movies using Kodi. Looking back I’m not sure how that PC was able to emulate anything at full speed but I remember games running pretty well. EmulationStation on the other hand took forever to scrape metadata especially with the complete ROM sets for most systems. Eventually the Zotac was replaced by an Intel Skull Canyon NUC running Ubuntu. The NUC worked a million times better than the Zotac but with Retroarch on Ubuntu it seemed like configs were broken every time I ran apt-get update. I decided it was time to do a new setup for emulation; with a combination of new and old parts I was able to build another PC with the following specs:
- Intel Core i7-4770K
- Noctua NH-L9I CPU Fan
- AsRock B85M-ITX
- 16GB Crucial Ballistix Sport VLP DDR3-1600
- 500GB Samsung 840 EVO
- 1TB Seagate Firecuda
- Gigabyte Radeon R9 Nano
- Fractal Design Node 202
- 600 Watt Corsair SF600 SFX Power Supply
- 2x Noctua 120mm NF-S12A Case Fans
The Node 202 is a compact ITX case which made cable management fairly challenging but I think I managed to pull off a decent job:


As you can see from the video, you get a short intro for each platform and gameplay footage per game if you have an EmuMovies account enabled for scraping. If EmuMovies doesn’t have gameplay footage then LaunchBox will usually at least display a screenshot of the game’s title screen. LaunchBox is a big step up from EmulationStation aesthetically; it’s also a big step up for storage requirements. I have the No-Intro ROM sets for the following systems: NES, SNES, N64, Game Boy, Game Boy Color, Game Boy Advance, Master System, Genesis, 32X, Game Gear and TurboGrafx 16. On top of this I have the complete ROM set for FBA 0.2.97.43 and the USA Redump PSX collection. With these platforms scraped in LaunchBox, the folder size weighs in at 152.4GB:
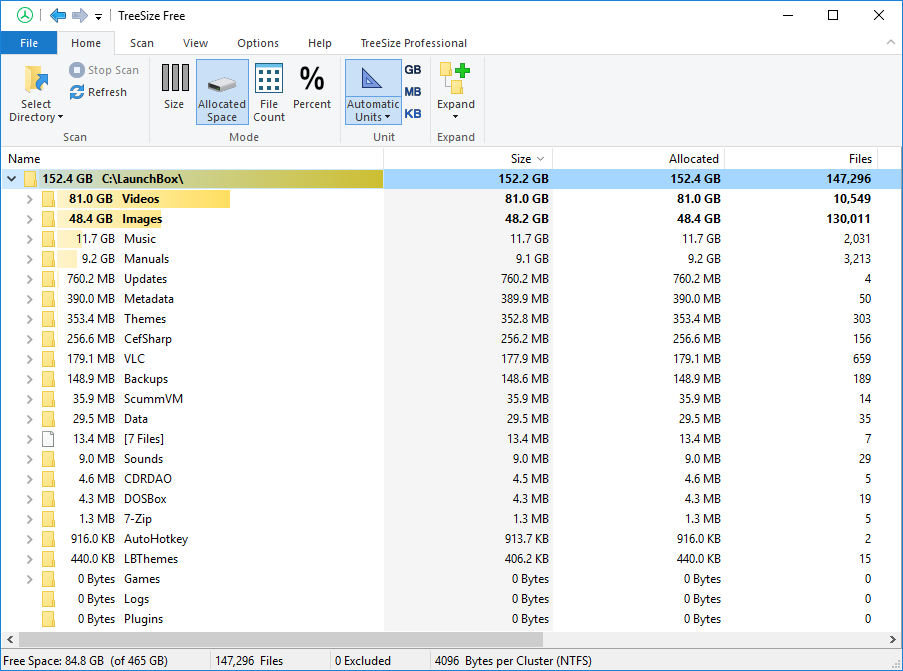
It should be no surprise Video is the largest subfolder at 81GB followed by Images at 48.4GB; I scraped my ROM collection with the default settings in LaunchBox so it’s possible to get a slimmer install by leaving out game manuals and other types of images like front/back box art, cartridge art, screenshots, etc.
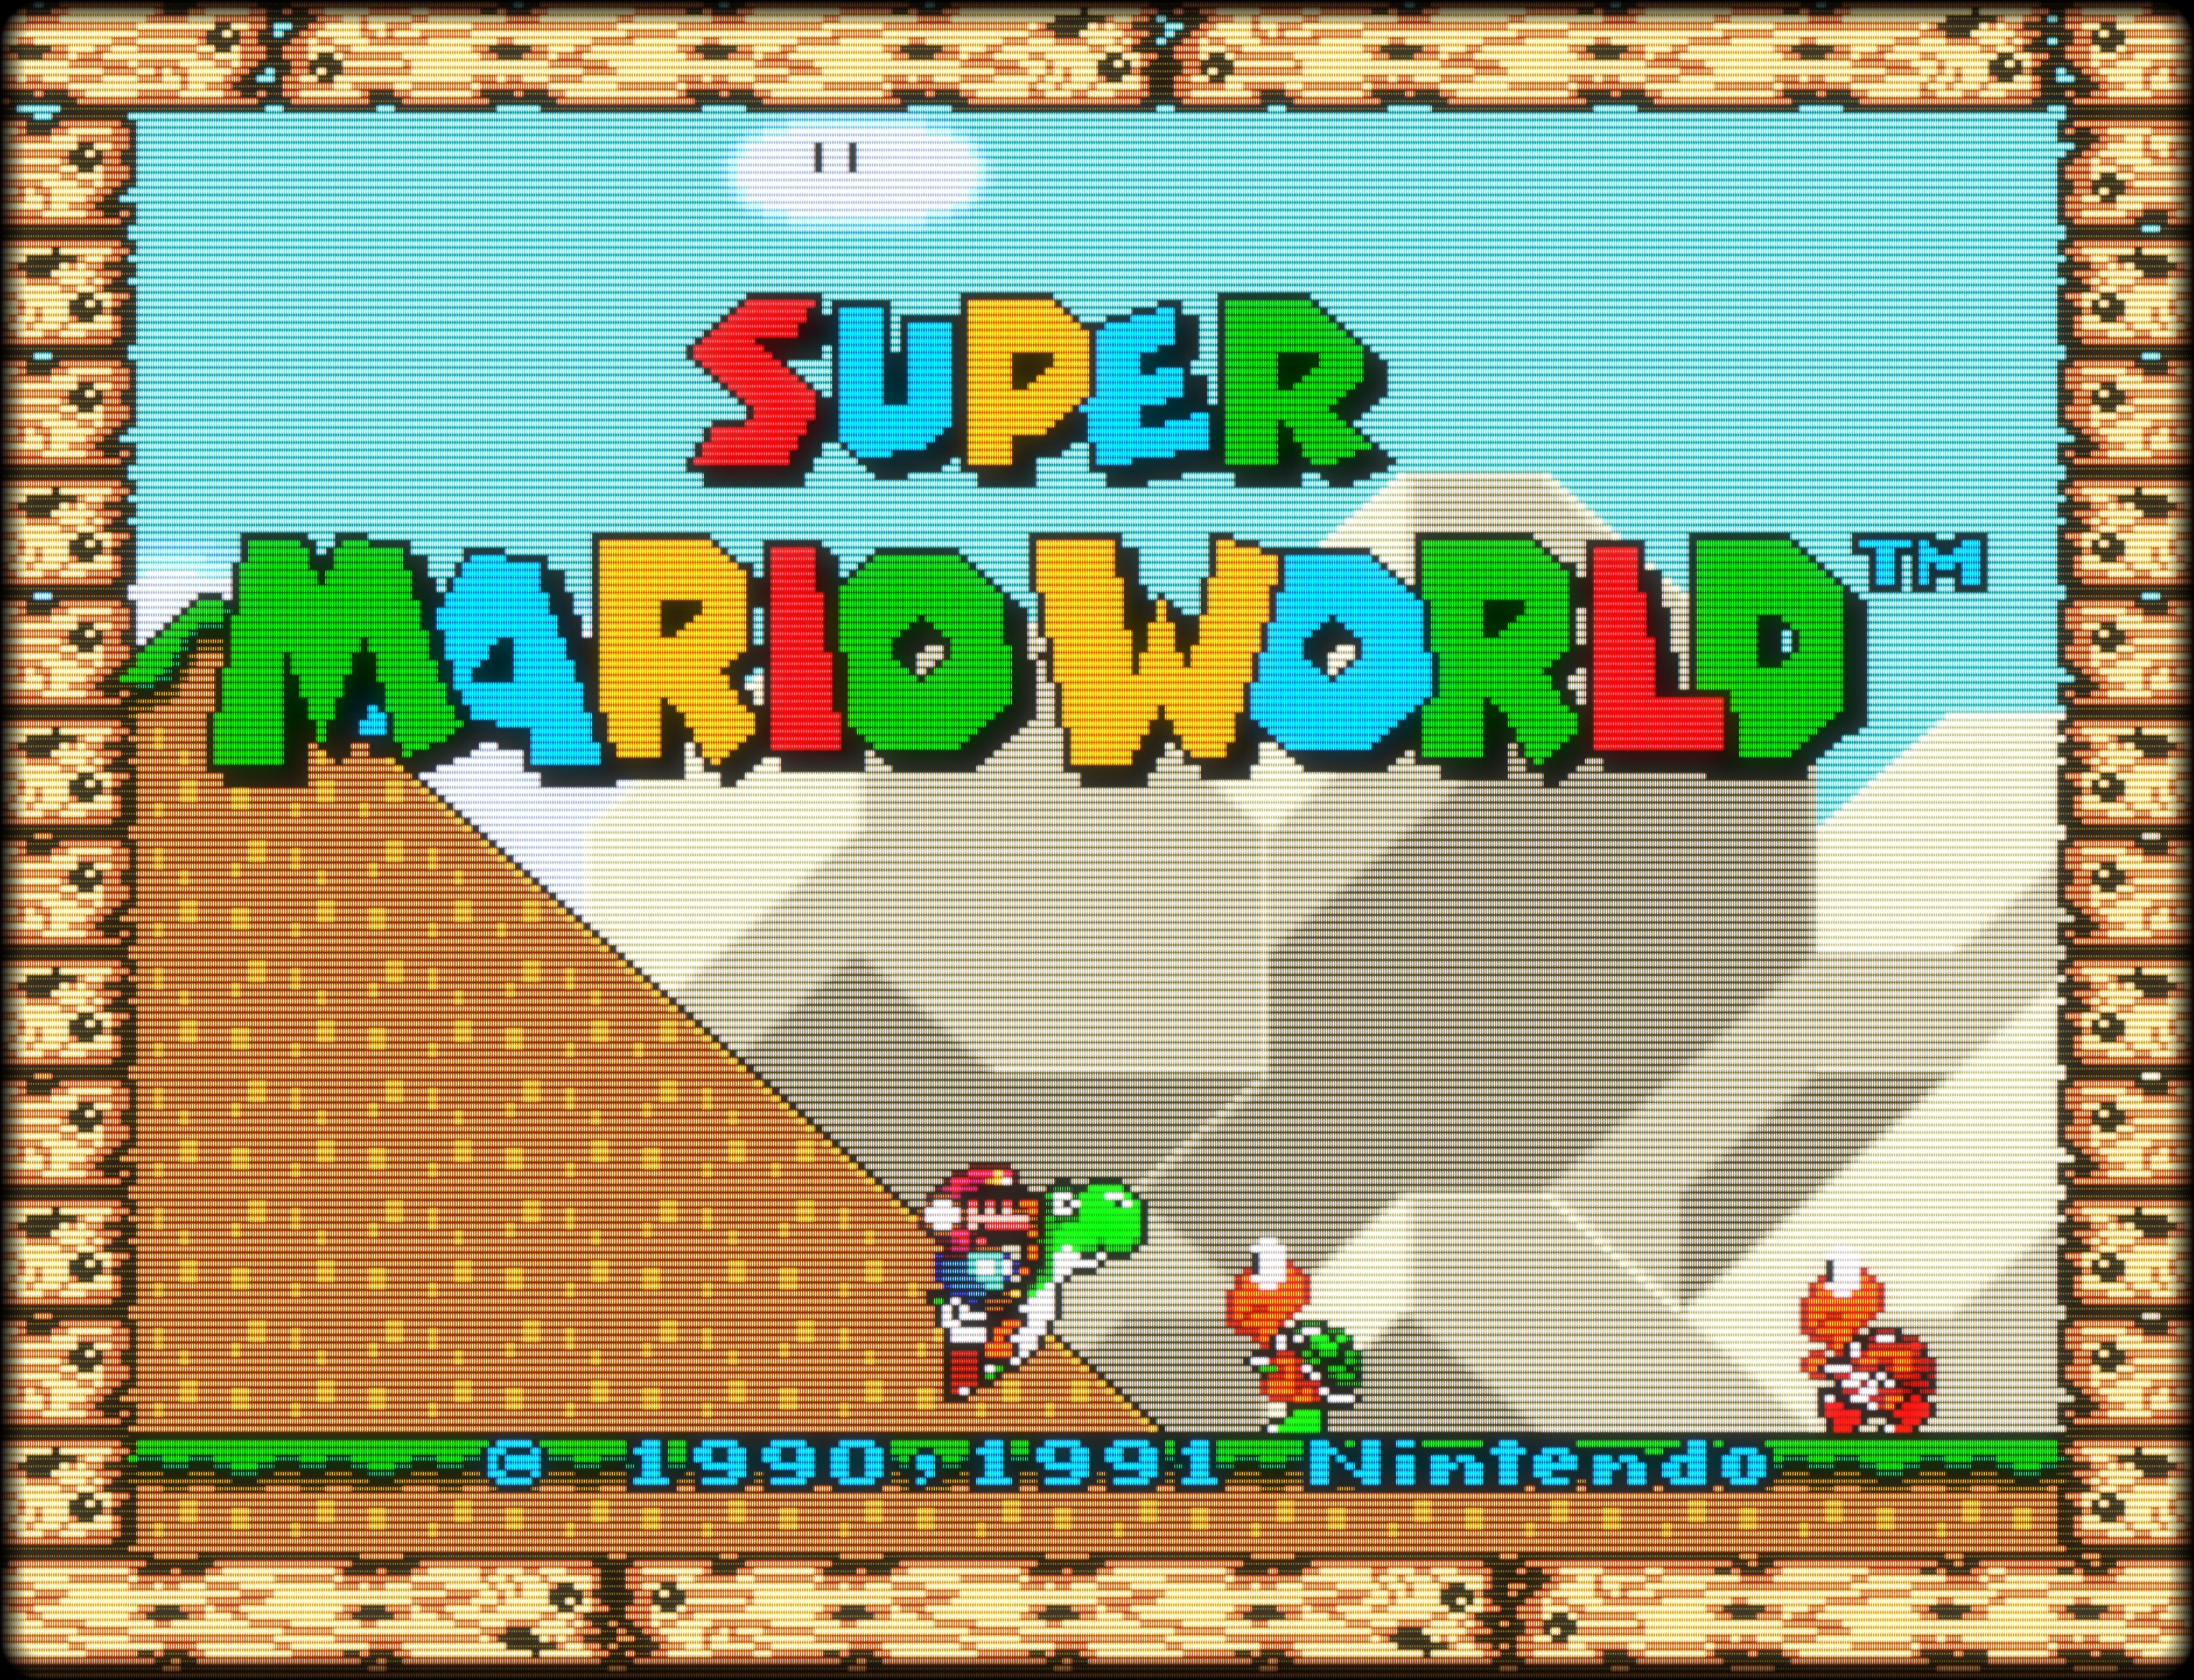
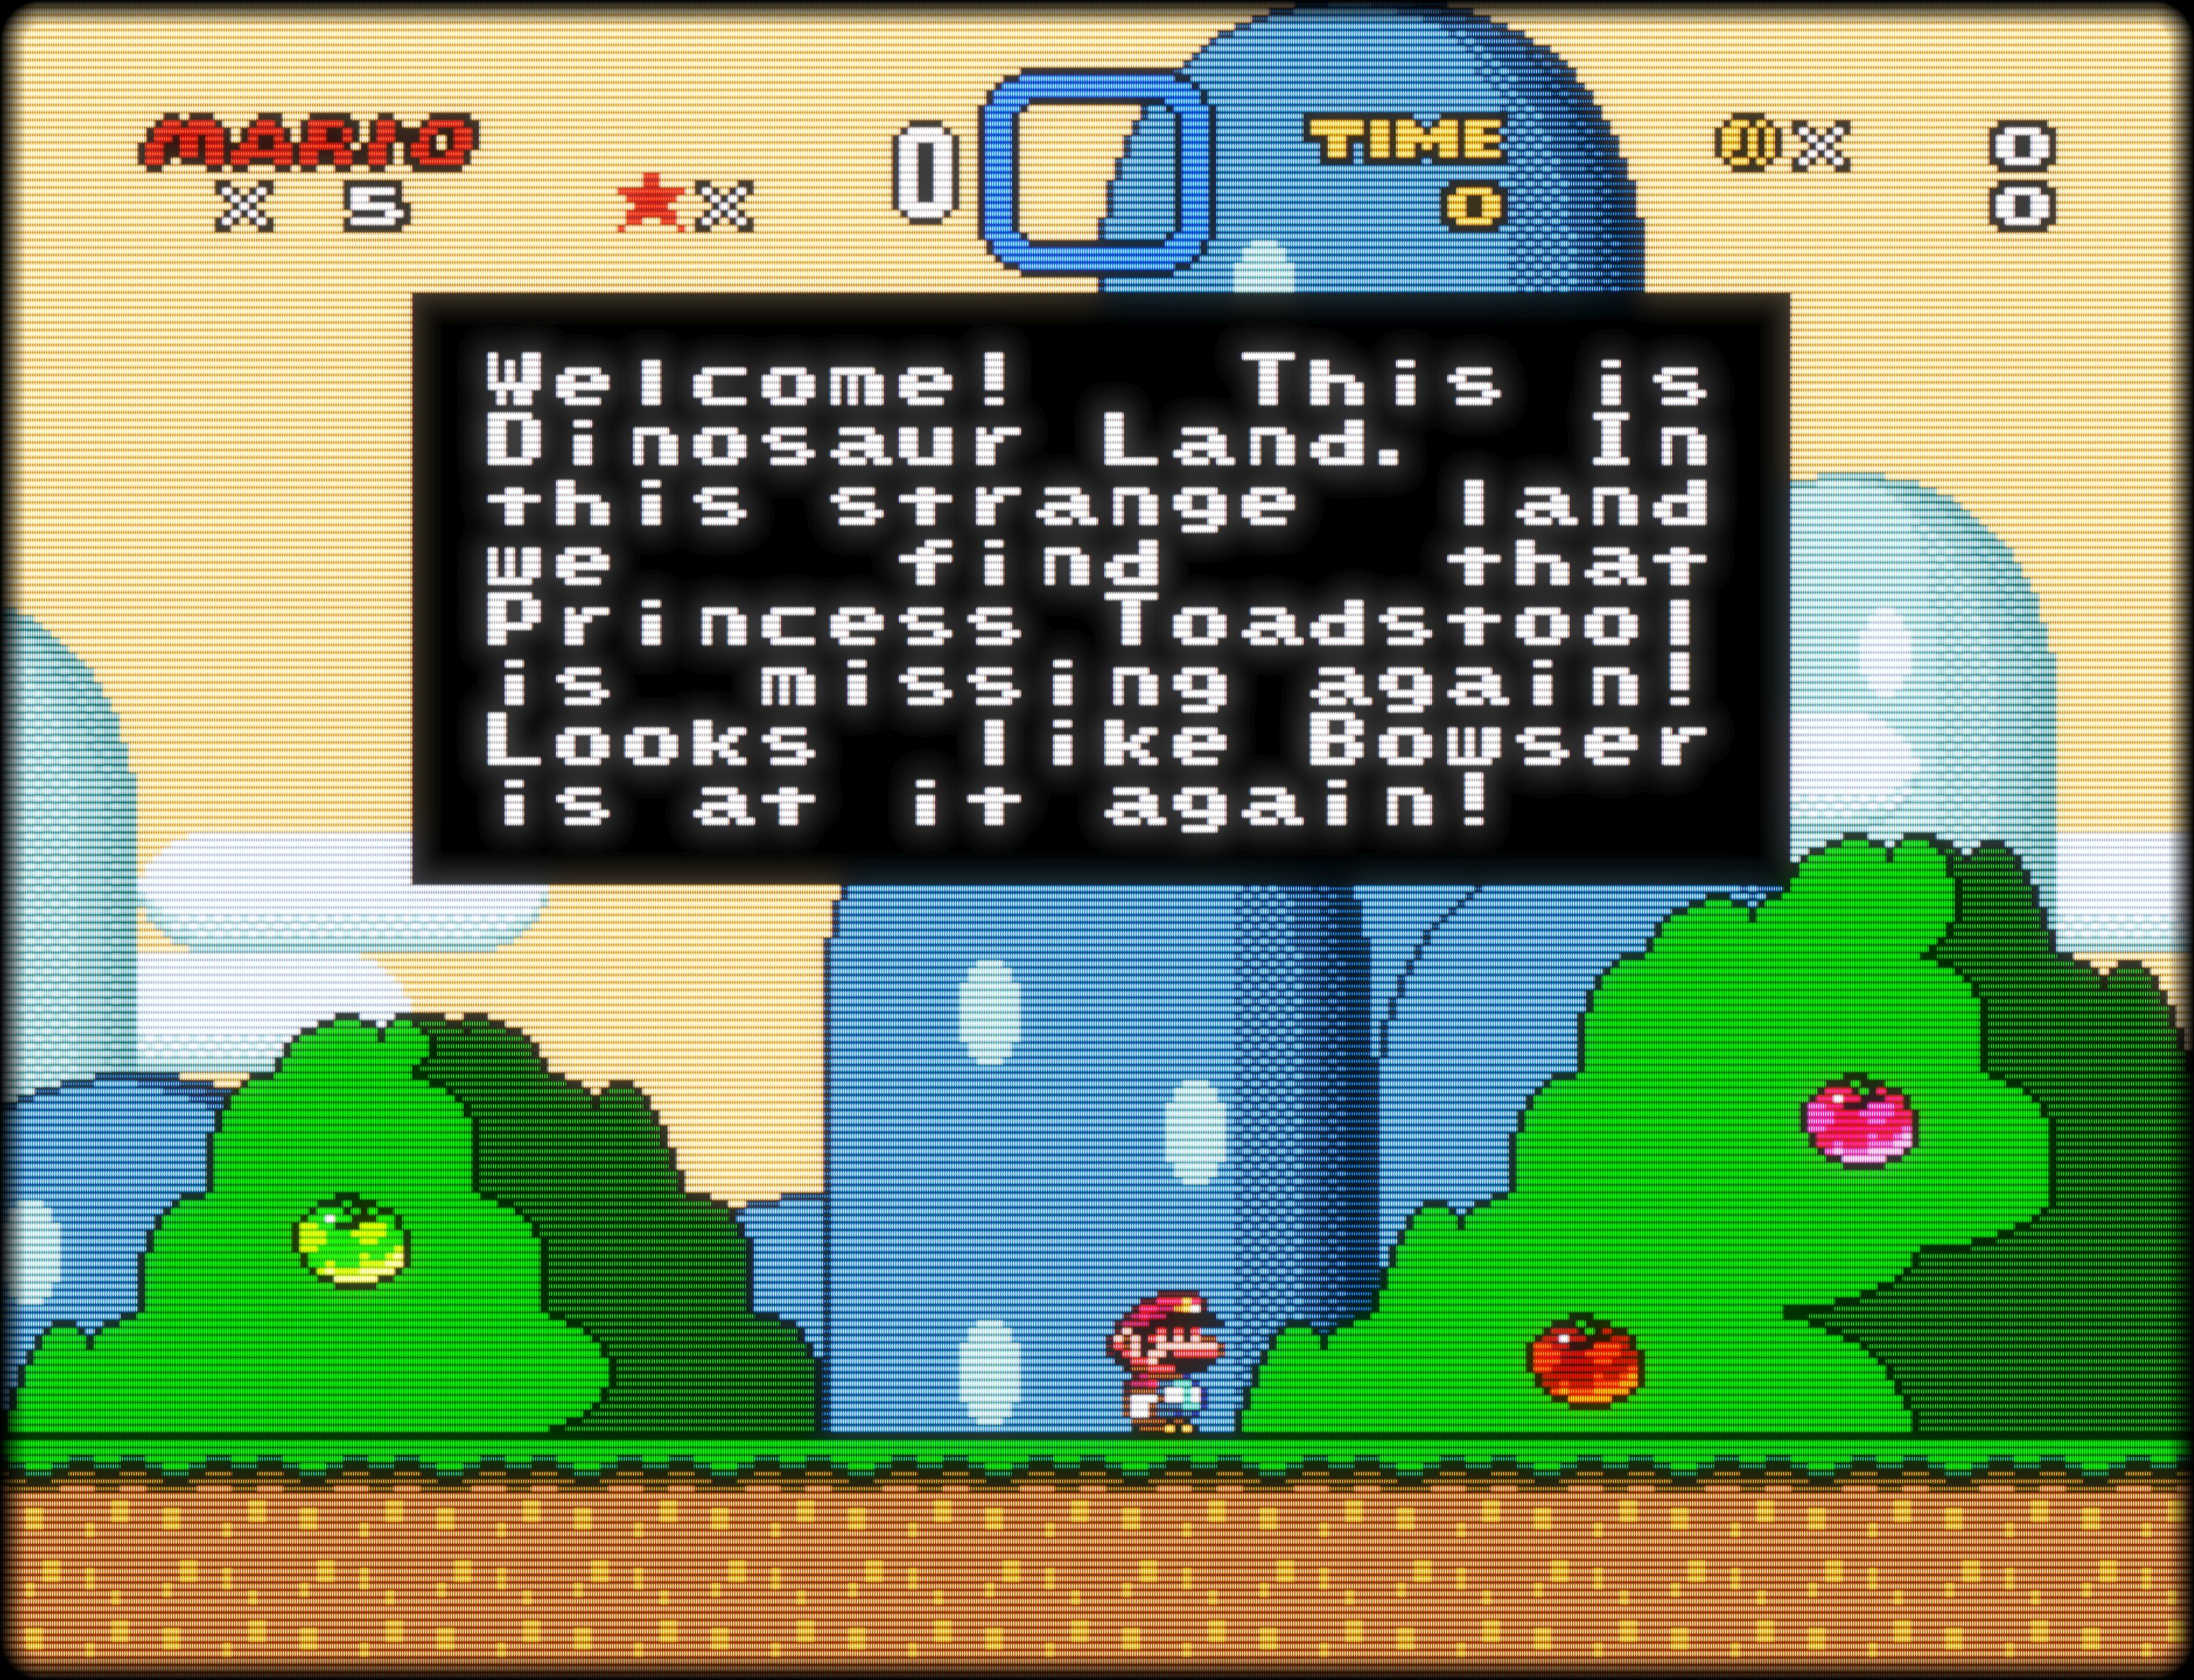
The 4770K and R9 Nano are a few years old at this point but are more than enough to handle RetroArch at 4K. The best part of this new build is I can use shader presets that brought my NUC to a crawl. My favorite shader so far is CRT-Royale – an advanced shader preset designed to recreate the look of a CRT monitor. You can see from the screenshots below it even recreates soft glow around sprites against a black background:


For controllers, I have the 8BitDo SN30 Pro and SF30 Pro, Xbox Wireless Controllers, and Qanba Q4 RAF arcade sticks. Both the 8BitDo and Xbox controllers are paired via Plugable’s USB Bluetooth 4.0 Adapter. The adapter is supported out of the box with Windows 10 and pairing the controllers was easy. I set my input driver in RetroArch to dinput which makes every controller show up as generic “Bluetooth XINPUT compatible input device”; the advantage here is I can pick up any of the Xbox or 8BitDo controllers and start playing. My default config in RetroArch uses Bluetooth controllers while I have a separate config for the FB Alpha core so the sticks are used for Arcade games. If you use mixed controllers, I recommend using devreorder – it’s a program that allows you to define the order in which controllers are enumerated in Windows. I have it set so the Qanba sticks are first, followed by the Bluetooth controllers. This way RetroArch will always see the sticks and controllers in the same order; without it my sticks would stop working if one of the Bluetooth controllers shut off from idle (when the controller shuts off, RetroArch would enumerate input devices again and my stick would no longer be assigned to Player 1).
If you want to set up LaunchBox and RetroArch for yourself, I recommend getting RetroArch working first as LaunchBox is just a front-end that will launch RetroArch with the game you choose. There’s a decent guide for setting up RetroArch from Lifehacker here and the Youtube channel for LaunchBox has a good video on setting up both RetroArch and LaunchBox. The Lifehacker guide doesn’t mention which RetroArch cores to use so I recommend you try out the following:
- Nestopia UE (NES)
- bsnes mercury Accuracy (SNES)
- Mupen64Plus (N64)
- Gambatte (Game Boy/Game Boy Color)
- mGBA (Game Boy Advance)
- Genesis Plus GX (Master System, Genesis, and Game Gear)
- PicoDrive (32X)
- Beetle SGX (TurboGrafx 16/PC Engine SuperGrafx)
- Beetle PSX (Playstation 1)
- FB Alpha (Arcade)
Most of these cores are the defaults shown in the setup video from LaunchBox. FB Alpha doesn’t emulate every Arcade game like MAME does but covers most of the ones I care about like Capcom CPS and Neo Geo games. I prefer using FB Alpha over MAME because the MAME cores require additional setup for controller inputs; the whole point of using RetroArch is to have a unified interface and set up your configuration once.