All posts by Sam Fisher

Fix File Explorer Webm Thumbnails on Windows 11

Two of my three Win11 installs would not generate thumbnails for webm files in File Explorer while using the “Extra large icons” view. The two in question were upgrades from Win10 and the third was a clean install of Win11 (which worked). Most solutions I found on Google were either rebuilding the thumbnail cache or installing Icaros.

I ended up fixing it by exporting the following regkeys for webm from the working Win11 install to the others (YMMV):


Logitech G Pro Wireless Double-Click Fix – Replace the Switches

Somehow my post on replacing G900/G903 switches became my most popular page according to the Google Search Console; depending on the query it’s even on the first page of Google results. If you’re new to the infamous double-click issue on Logitech mice, the TL;DR is that the stock Omron switches are garbage and you should replace them with better ones.

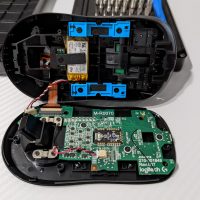
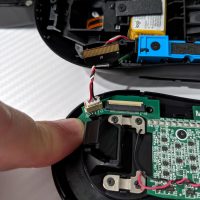
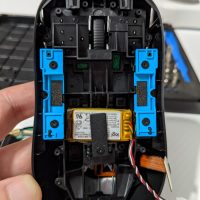
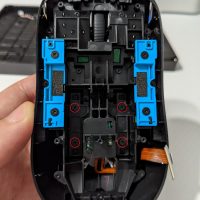
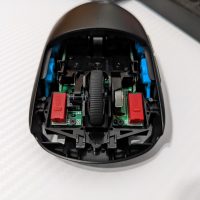
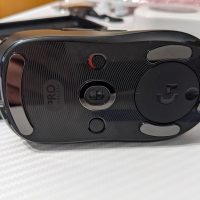
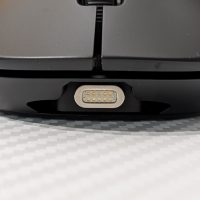
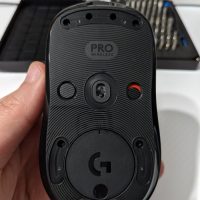
Since I’ve recently switched from the G903 Hero to the GPW, I thought I’d do a similar write-up on how to do a partial teardown. Mine’s been modded with Kailh GM 4.0 switches, Kailh 8mm rotary encoder, Ceramic Mouse Skates and NetDot Magnetic Micro-USB Adapter.

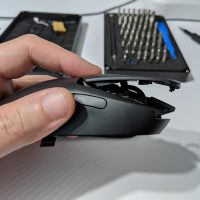
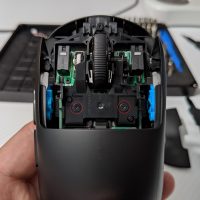
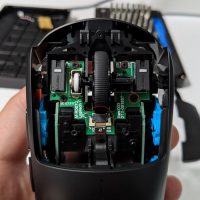
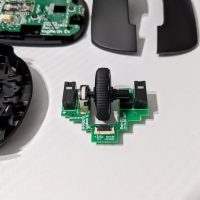
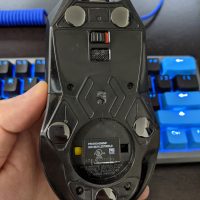
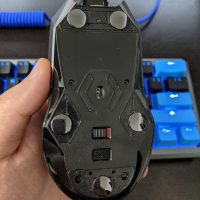
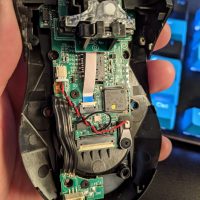
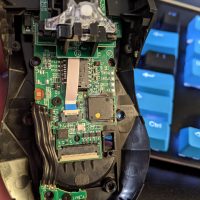
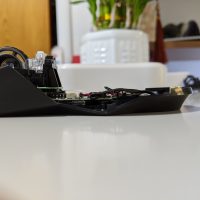
The GPW is much easier to open up compared to the G900/G903; you can get to the main PCB for the left/right/middle switches and mouse wheel encoder without tearing the mouse apart completely. Here’s a few YouTube videos that detail tearing down the GPW:

These videos and the gallery below should help you in disassembling your GPW to upgrade the switches. Pro tip: the iFixit iOpener is really useful for removing mouse feet cleanly but I would recommend having an extra set just in case.

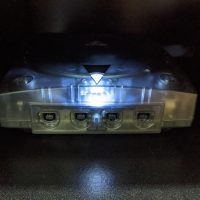
Sega Dreamcast Mods and Accessories

There doesn’t seem to be many compiled lists of modern Sega Dreamcast mods or accessories so I’ve put together a list which includes things I’ve done or used. This list is by no means exhaustive but should help you get started if you’re new to the Dreamcast.

Optical Drive Emulators

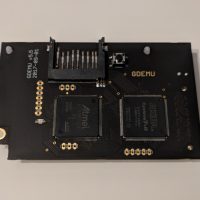
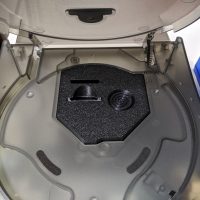
GDEMU – I believe this is the first ODE for the Dreamcast. The original GDEMU is only available directly from https://gdemu.wordpress.com/ but the creator only sells it once in a blue moon. I was lucky and managed to snag one a few years ago. There are many clones of it available on eBay or Aliexpress (look for 5.15b versions). The main difference between the original and clones is: 1) you can’t do firmware upgrades on clones and 2) the clones have bugs with Skies of Arcadia and Resident Evil Code Veronica that were fixed by firmware upgrades on the original.

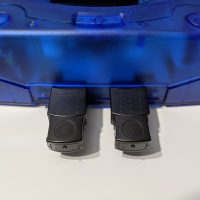
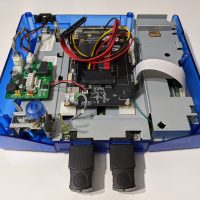
GDEMU 3D Printed Mount – This is a 3D printed mount for the GDEMU and includes an SD card extender to give you a cleaner look. I used to have a version of this that required gluing to the top half of the Dreamcast shell but this one from Laser Bear screws securely to the GDEMU itself.

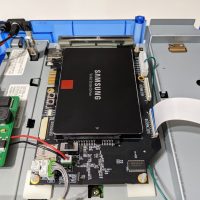
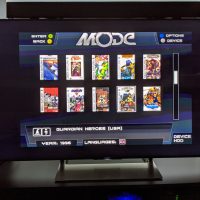
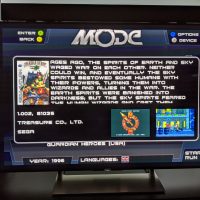
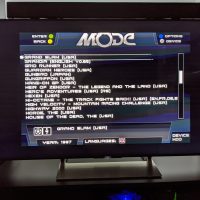
Terraonion MODE – This is works on Saturn, Dreamcast and now PSX but I’ve only used it for the Saturn. It is the most premium option but allows you to use 2.5″ SATA HDD/SSD, SD card or even USB drives. It can also display cover art.

USB-GDROM – I never used one of these but I think it was the alternative choice to GDEMU a few years ago before GDEMU clones flooded the market.

Video Output

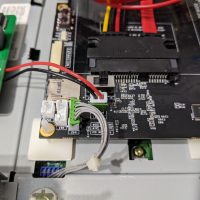
DCDIGITAL – This internal mod adds native HDMI output to your Dreamcast and results in the absolute best picture quality possible.

OSSC – This is an upscaler that can be used for many other consoles, not just the Dreamcast. I’m using an old VGA box I bought over 10 years ago connected to the OSSC to game on my HDTV.

RetroTINK-5X Pro – A newly released upscaler that features automatic optimal phase sampling to get the best picture without tinkering. I’m using this for my Saturn instead of the OSSC as the 5X Pro is better at handling resolution changes and deinterlacing.

Pound HD Link – This is probably the cheapest way to connect a Dreamcast to an HDTV. See The Dreamcast Junkyard’s review here.

Other video options for the Dreamcast are covered in depth at RetroRGB.

Power Supply

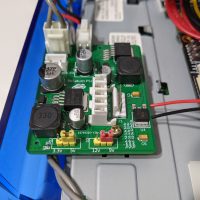
You’re probably better off recapping the original PSU using kits from Console5. The Dreamcast (and Saturn) PSU replacement trend was probably started by YouTubers and I myself just did it for the sake of doing it.

Pico Dreamcast v1.1 – An adapter that will let you use a PicoPSU with the Dreamcast. If I had to do it over again, I would go with this option and a real PicoPSU from Mini-Box.

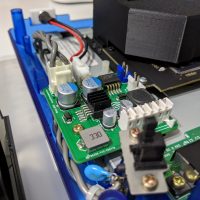
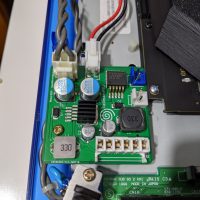
ReDream PSU – This is an aftermarket PSU I am using for my Dreamcast (I also have the Saturn version). So far it has worked pretty well and my Dreamcast and house are still in one piece. Their eBay storefront is here.

DreamPSU – I believe this is the first aftermarket PSU for the Dreamcast and it went under after it was fully funded due to reasons. The creator released the design as open source which is why you see many clones of this thing out there. I’ve read anecdotes that it is a generic off the shelf design, not actually designed with the Dreamcast in mind. I would avoid this one.

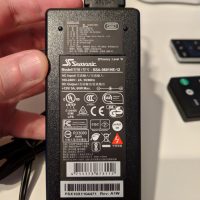
Seasonic SSA-0601HE-12 – This is a 12V 5A Seasonic power supply I’m using with the ReDream PSU. I went with this due to Seasonic’s PC power supply reputation.

Internal Components

Capacitor Recap Kit – Complete kits for replacing the old capacitors in your Dreamcast, on both the motherboard and power supply.

Controller Port Fuse – This replaces the fuse on the Dreamcast controller board with a resettable one.

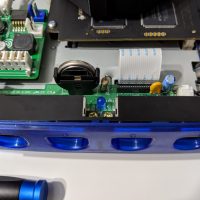
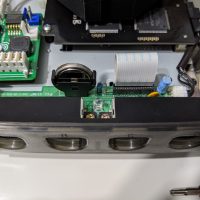
Vertical Battery Holder – The original Dreamcast battery is soldered to the board and by this point just about all of them are dead. By soldering in this holder, you can replace the battery with a new rechargeable ML2032. There’s an alternative mod to this where you can solder in a diode to stop the current flow to allow use of non-rechargeable CR2032s which should last longer.

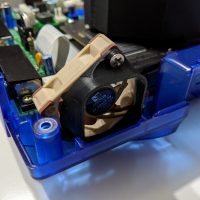
Noctua Fan Mount Kit – This kit will let you replace the Dreamcast fan with a Noctua NF-A4x10 5V fan instead.

Misc

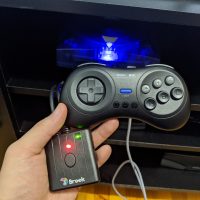
Brook Wingman SD – Connect modern controllers to your Dreamcast with this. It also has storage equal to one VMU and can also be flashed to 240 blocks (just like a real VMU).

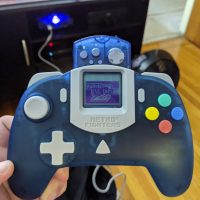
Retro Fighters StrikerDC – A modern take on the Dreamcast controller. The dpad, buttons and triggers are pretty decent but the analog stick is way too easy to move around; doesn’t have the same level of tension are the original.

Aftermarket Shells – I bought my shells from this eBay seller last year but there are other sellers carrying them now: Game-Tech and Muramasa Entertainment.

Links

In no particular order, here are some links to vendors and helpful sites for the Dreamcast (most of which were already linked to above).

Building a Better Mouse Continued: Ceramic Mouse Feet and 2200 mAh Battery Life

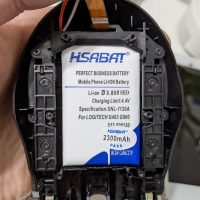
A few months ago I put together a mod list for the G900/G903 which included a 2200 mAh battery I found on Aliexpress (although it came with a sticker that said 2300 mAh). I charged the battery to full on September 12th and took a screenshot of the battery life as measured by G Hub at the end of every week. There was 4% battery remaining on Nov 5th. I used the G903 with 1000 Hz polling rate and RGB on. Certainly not the most scientific testing but this battery seems like a good replacement for the original battery.

After playing around with a Model O Wireless and their ceramic G-Floats, I decided to give my G900/G903 the same kind of treatment. I’ve read conflicting information as to whether the Lexip ceramic feet work on the G903 or not but am happy to report that it does work on both the G900 and G903. The only issue I had was trying to position the Lexip feet in a way that keeps the mice perfectly level so it doesn’t wobble when clicking (apparently my mouse pad or desk isn’t perfectly flat). I ended up removing and repositioning the ceramic feet multiple times to get it right. At the time of this writing the cheapest place to buy Lexip ceramic feet is BestBuy (currently $9.99 USD).

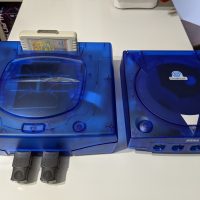
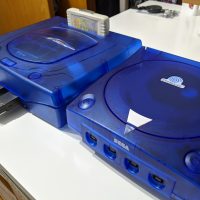
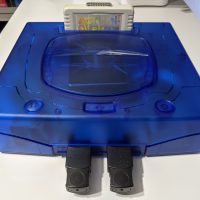
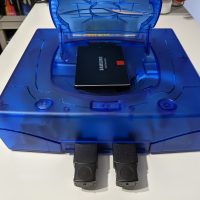
Sega Saturn – Good in Blue

I preordered a Crystal Blue shell for my Sega Saturn back in November and received it last weekend. It’s a great match for the Crystal Blue Sega Dreamcast shell I picked up last summer. This particular Sega Saturn is one I picked up recently (it even came in a Funcoland box) and has a few mods in addition to the replacement shell:

Building a Better Mouse: Logitech G900/G903 Mod Parts

TLDR: Just go to the bottom if you want to see a list of parts you can buy to mod your G900/G903. See my older post or watch this video by Ents if you need guidance on taking one apart.

I’ve been using the Logitech G900 mouse since 2017; it has served me well especially after discovering how to upgrade the switches (although the G900 doesn’t seem to be as famous as the newer G903 models for double-clicking).

I’ve actually purchased the new G903 Hero on 3 separate occasions in an effort to get a “better” G900. When it was announced last summer, I preordered it for $149.99 – I used it for about a week before returning it to Logitech for a full refund. The battery life improvements from the new Hero sensor were fantastic; the battery life percentage barely dropped during that entire week. However this was before my journey into upgrading mice switches and I returned the G903 Hero because the clicks seemed too soft and middle mouse button barely had any tactile feedback. I went back to my trusty G900.

Three months ago, there was a sale on the G903 Hero on Amazon for $99.99 so I pulled the trigger on two of them. I planned to upgrade them with Omron Japan D2F-01 switches but both units had zero feedback on the middle mouse button. There was no tactility or any movement when you pressed down on the mouse wheel for middle mouse clicks. Disappointed, I returned both of them to Amazon for a full refund. About a week later, Best Buy had the G903SE on sale for $69.99; I decided to gamble on one of these since it was relatively cheap. The middle mouse on this worked just like my G900 but aside from the addition of PowerPlay charging, there was really nothing else this mouse offered over my G900.

About a month after that, my G900 middle mouse button started to double-click. Eventually I ended up going down the rabbit hole that is Aliexpress shopping; I found just about every part inside the G900 for sale including the entire PCB that contains the middle mouse button. I fixed the middle mouse click on my G900 with that part and then realized I could also fix the middle mouse on the new G903 Hero models…

Last week, Amazon had the G903 Hero on sale again for $99.99 so I ordered it again (just one this time). To my surprise, this G903 Hero had a proper middle mouse button and worked just like my old G900; sharp responsive tactile feedback. Only took three attempts and four units to get a proper one. Now that I had a G903 Hero that passed quality control properly, I went to work on modding it to my liking. Below is a list of parts you may be interested in if you like the G900/G903 mouse as much as I do.
Switches

  • Omron Japan D2F-01 – heavy switch with operating force of 150gf. This is my favorite switch for the G900/G903.
  • Omron Japan D2F-01F – light switch with operating force of 75gf according to the manufacturer; Ents rates it closer to 55gf.
  • Kailh GM 4.0 – popular heavy switch that I use for other mice; feels lighter than the D2F-01 when used in the G900/G903.

Power

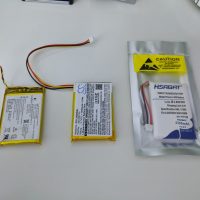
  • Replacement Batteries: 1000mAh and 2200mAh – I’ve had the 1000mAh battery in my G900 for the past year and it works as least as well as stock. I just put the 2200mAh one into my G903 Hero so I can’t comment on its reliability (EDIT: battery life seems pretty good, see this post). Both of these batteries are larger than the original so you will have issues closing up the G903 properly because of the added height from the PowerPlay charging components. I ripped all of that out to make the 2200mAh battery fit.
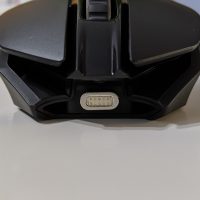
  • NetDot Magnetic Micro-USB adapters – a slick way to charge your G900/G903 – see it in action here. I use these with an Anker Powerline+ Micro USB cable and Anker PowerPort Mini.
  • WizGear Metal Mount Plate – this is a metal plate for those magnetic smartphone holders you put in your car. If you stick this plate on the back of your monitor, you can hide your charging cable out of sight with the NetDot adapter like this.

Spare Parts

  • Corepad Skatez for the G900 and G903 – 100% teflon replacement feet. Taking apart the G900/G903 requires ripping off the mouse feet. These are great replacements and glide faster than stock.
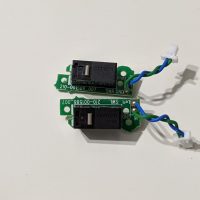
  • G900/G903 Mouse Wheel PCB – replacement PCB that includes the middle mouse button, rotary encoder and left/right horizontal scroll buttons. I used this to fix my G900’s middle mouse double-click.
  • G900/G903 Flex Cable – this connects the bottom PCB to the Mouse Wheel PCB in the top half of the mouse. It also contains the LED that lights the Logitech G logo on the back of the mouse. I ripped one of these by accident last year when I upgraded my G900’s battery.
  • G900/G903 side button PCB – replacement PCB that includes the left/right side buttons and DPI buttons on the top of the mouse. I bought a few extras of these but haven’t actually had to use them yet.

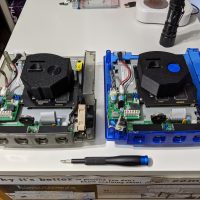
A Tale of Two Dreamcasts

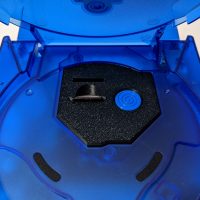
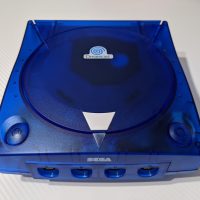
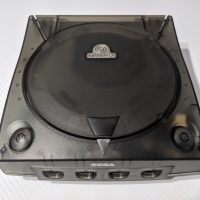
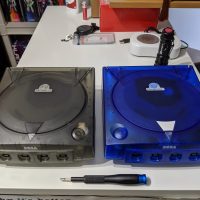
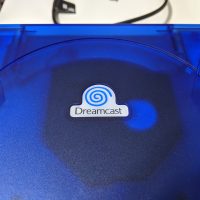
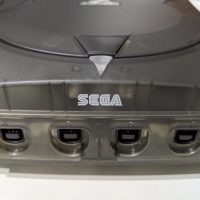
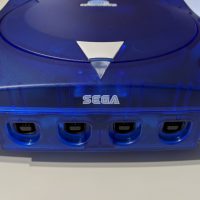
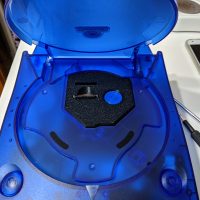
I finally got around to buying some aftermarket Dreamcast shells from eBay seller hdzoneau. I bought a Gray Skeleton shell reminiscent of the Skeleton Sega Saturn and a Crystal Blue shell. I was surprised at the speed in which they arrived (AUS to USA in a week) and the build quality – I wouldn’t have guessed these were aftermarket shells.

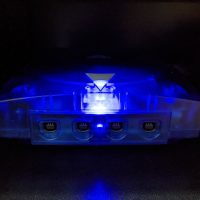
I transplanted my previously modded Sega Dreamcast in the Crystal Blue shell. This particular VA1 Dreamcast is actually my first Dreamcast I bought back in 2001 just around the time of its decline. I still remember borrowing a friend’s burned games and going through a 100 CD-R spindle copying everything over a weekend with my 4x TEAC CD-RW. To go with this new shell, I picked up some new mods; I bought a ReDream PSU from eBay seller rexurepair0 and new GDEMU/Noctua mounts from Laser Bear Industries. This new GDEMU mount is an improvement over the one I bought last year since it doesn’t require any gluing to the top half of the Dreamcast shell. I also swapped the original LED with a blue one to match the new shell. Lastly, I also replaced the thermal pads on the Dreamcast with Fujipoly Extreme 1.5mm.

I also ended up fixing up another VA1 Dreamcast that was from a Goodwill auction I won for $21.50 about 2 years ago – it was a lot of 2 “as is” Dreamcasts, both of which were in poor cosmetic condition but otherwise functional. I fixed up this one with the same mods as my other Dreamcast but with a 5.15B GDEMU clone rather than original. This Dreamcast received a white LED instead to go with the Gray Skeleton shell.

The only mods I’m missing is the famed DCDIGITAL (aka DCHDMI) mod; fortunately I was lucky enough to snag 2 of these with spare flex ribbon cables last week. I’m still waiting for them to arrive but I will try my hand at installing them once I get better soldering equipment.

Fix Domain Trust Issues Through Powershell

It’s been a long time but today I tried logging into a PC and was greeted with the familiar “The trust relationship between this workstation and the primary domain failed”. Fortunately I was able to log in with the local administrator account and fix the domain trust issue with Powershell. This command is much easier and faster than the old way of unjoining/rejoining the domain and doesn’t require a reboot. Open Powershell as local admin and type:

Enter your admin credentials in the popup window and you should be all set.