Sapphire 290 RMA and Quality Control

Around March of last year I upgraded my main system from an i7-930 running @ 4GHz to a Haswell system running a 4770K; I also replaced my Radeon 6970 Crossfire setup with a pair of Sapphire Tri-X R9 290s. After doing some research, they seemed like one of the best R9 290 cards at the time.

After about two weeks of using the 290s, I noticed in some gaming scenarios the increased fan speeds caused a rattling noise. Here are some videos others have made of the same issue:

Sapphire R9 290 Tr-x Fan Crackling Noise 2
Sapphire r9 290x Tri-X vibrating / rattle noise (Yes, this is a 290X but it uses the same cooler.)

I also found a video on how one person tried to fix theirs but it didn’t work in my case. I decide to RMA the card and this is when I learn that Sapphire doesn’t handle the RMA for US customers directly; instead it is handled by a company called Althon Micro. If you do a google search for “Sapphire RMA” you will find many complaints about the quality of their service:

http://www.techpowerup.com/forums/threads/sapphire-rma-testimonial-dont-buy-if-your-not-in-asia.187431/
http://www.rage3d.com/board/showthread.php?t=34007460
http://www.overclock.net/t/1504783/sapphire-rma-buyer-beware
http://www.newegg.com/Product/SingleProductReview.aspx?ReviewID=4048662

I contact Althon Micro on 4/2/2014 and receive my RMA authorization on 4/3/2014 without any hassle; simply gave them the receipt for my purchase and explain the noise issue. The replacement Tri-X 290 is delivered to me on 4/14/14; the entire process takes 12 days including shipping time for me to deliver the faulty card and to receive the replacement. Everything considered, not too bad.

Around 8 months later, I notice the 290 that was the replacement unit begins making the same rattling noises. Disappointed, I contact Althon Micro again for a 2nd RMA. I contact them on 12/2/14 and receive RMA authorization on 12/3/14 again without any hassle; simply emailed receipt and description of the issue. After shipping the faulty card to Althon, I receive an email on 12/8/14:

vaporx_upgrade

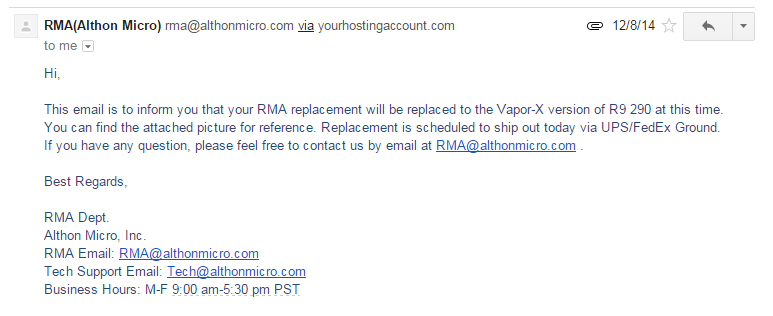
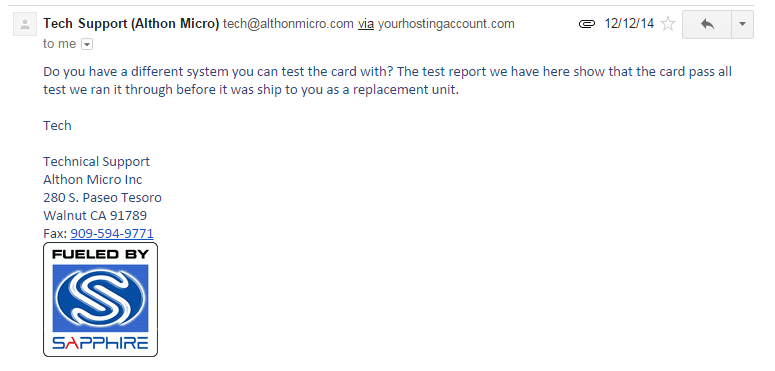
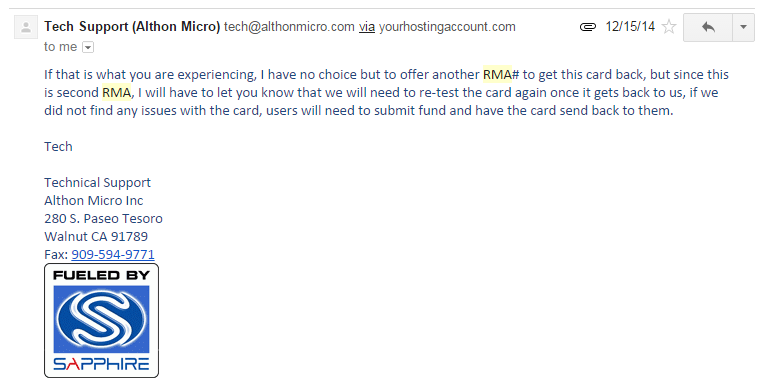
The Vapor-X is a true custom design 290 with higher clocked core and memory; essentially a small free upgrade for my troubles with the Tri-X. The Vapor-X 290 is delivered to me on 12/10/14 and initially appeared to be fine until I started watching video; any local video playback or streaming from the web resulted in heavy flickering on the desktop exactly like this video. I contact Althon Micro on 12/12/14 for a 3rd RMA and encounter resistance; fairly standard scripted troubleshooting questions involving updating drivers, trying different video ports and using another system to test. I’ve included two of their responses below, one mentioning how the card was tested before shipment and the second regarding paying to receive the card back if they cannot find any issues:

althon_pass

althon_retest

I receive my 3rd RMA authorization on 12/17/14 and receive my replacement on 12/26/14; fortunately the replacement did not have any fan rattle or flickering issues and is still working presently. Based on this experience with Sapphire’s products and reading about it from other people, I simply cannot recommend anyone purchase Sapphire products. If you’re lucky enough to win the quality control lottery and never have any future issues, then good for you. Some of us haven’t been as fortunate.

Fsck on Synology DS1511+ (DSM 5.1)

I’ve recently upgraded my Synology DS1511+ to DSM 5.1 and found an simpler way to run fsck than my previous post.

Issue the df command via terminal and note what is displayed under the “Filesystem” column for /volume1 (this is where your data is stored):

Next run:

Once the check is completed, reboot your Synology from the terminal with reboot.

Erratic Bluetooth/Apple Trackpad on Yosemite Hackintosh

Since upgrading my Hackintosh to Yosemite, I’ve noticed a few instances where my Apple Trackpad becomes unusable; it will show as connected but the cursor will not move or move erratically and multi-touch gestures will not work. I am using the IOGEAR 4.0 Bluetooth dongle as recommend by tonymacx86. This usually only happens when I do a Time Machine restore (after failed attempts to optimize kexts or settings) but it happened today while tinkering with CPU power management.

I haven’t been able to find any useful information related to this but through trial and error I’ve found an odd solution.

  1. Remove all paired devices under System Preferences > Bluetooth
  2. Shutdown the Hackintosh
  3. Remove the USB dongle
  4. Power on the Hackintosh and shut it down again after it finishes loading
  5. Reconnect the USB dongle and power on the Hackintosh
  6. Repair your devices

Intel SpeedStep on Yosemite Hackintosh

While using my Hackintosh today, I noticed that I only ever have the minimum frequency (800mhz, 8x100bclk) and the maximum non-turbo frequency (2.8Ghz, 28x100bclk) for my Intel i5-4440S. I was using iStat Menus to check this info and based on this, I spent a great deal of time trying to figure out how to make it work properly. I only learned much later that most utilities only report the min and max frequency and nothing in between.

Initially I tried changing the smbios to iMac 14,1 since that is closer to my system than the MacMini 6,2 definition; the iMac is Haswell and the MacMini is Ivy Bridge. Eventually I stumbled onto http://www.tonymacx86.com/mavericks-desktop-support/128926-mavericks-native-cpu-igpu-power-management.html – a complete guide to enable proper CPU power management and well as the correct utilities to check with.

I downloaded the ssdtPRGen.sh script to generate an SSDT file to enable the proper CPU power management:

This generated the following output:

You can see in the output above that it correctly detected and generated the missing P states in-between the min and max frequencies as well as the turbo frequencies.

Since I originally used the Multibeast option “Patched AppleIntelCPUPowerManagement”, I restored the original AppleIntelCPUPowerManagement.kext from my Unibeast installer.  Then I used Chameleon Wizard to disable the “Generate P-States” and “Generate C-States” options and enable “Drop SSDT” so the ssdt.aml generated earlier is loaded by the bootloader (ssdt.aml needs to be copied to your /Extra folder, which ssdtPRGen.sh will do for you).

The Intel Power Gadget and AppleIntelCPUManagementInfo.kext can be used to verify whether or not power management has been correctly enabled. Below you can see the outputs from my system:

How to Center NextGEN Gallery Thumbnails

Thanks to this blog post I finally found the solution for centering the thumbnails in NextGEN Gallery.

In your NextGEN Gallery Settings go to “Other Settings” > “Styles” > “Enable Custom CSS” and paste the following code:

Now your NextGen Gallery thumbnail will be centered instead of left aligned, as in this post.

Hackintosh – ASRock Z87E-ITX and OS X 10.10 (Yosemite)

I’ve successfully upgraded my Hackintosh to OS X 10.10 and everything works the same as before. The process was basically the same as my original Mavericks install. All you need is to create the Unibeast USB installer by following http://www.tonymacx86.com/445-unibeast-install-os-x-yosemite-any-supported-intel-based-pc.html. It is important to note that the new Yosemite based installer seems to have removed the option “Restore System from Backup”; so you will to keep your older Mavericks based Unibeast USB for doing full Time Machine restores.

Initially I had trouble with FakeSMC and audio not working; turns out this was because I forgot to check the new option in Multibeast for “Kext Dev Mode”. After reinstalling with that option enabled, sensor monitoring and audio was working.

HPN-SSH on CentOS

Somewhere along learning how to build my own blog and LAMP stack, I stumbled across HPN-SSH – a project to improve network performance in SCP file transfers.You can read more about it here.

This is how you can install it:

Install required software for compiling and patching OpenSSH/HPN-SSH:

Download latest versions of OpenSSH portable and HPN-SSH patch into /usr/src:

Extract OpenSSH:

Change directory in extracted folder and apply patch:

Configure OpenSSH:

Remove old config files to prevent any conflicts:

Compile and install:

Now we have the newest version of OpenSSH installed and patched with the improvements from HPN-SSH; however we still need to make some changes to the /etc/ssh/sshd_config to take advantage of them. Near the bottom of your config file you will see a section for HPN related options; I used the following options from other guides I found:

Another important thing to note is that the new sshd config file will reset some of your options like PermitRootLogin so be sure to check those. On my system the SyslogFacility option was commented out so the ssh related messages were logged to /var/log/messages instead of /var/log/secure; this subsequently broke my fail2ban setup since fail2ban was looking for failed authentications in /var/log/secure. To fix this I had to change the SyslogFacility option to:

Don’t forget to restart sshd when you’re finished:

Remove /home Partition on CentOS

During my experiments with building a seedbox, I noticed that CentOS created a separate partition for the /home directory. Since I was building a seedbox at a cloud provider, I wanted the entire disk as a single partition for large torrent downloads.

Below is an example layout on a default install of CentOS 6.5:

The following commands will remove the /home partition and resize the root one:

Running df-h again will show that we have a single partition for /:

Now we still need to edit /ect/fstab to prevent CentOS from trying to mount a non-existent partition on start up. Delete the line that corresponds to the old /home partition; in my example its line 10:

Fifth Freedom