Category Archives: PC Hardware

Black X Blue 3950X – Final Final Form and Revision History

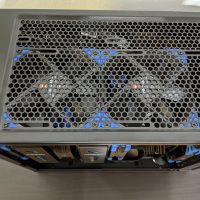
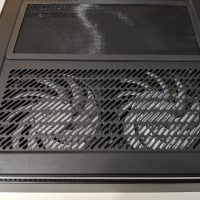
About a week ago I finally noticed the Define Nano S actually has mounting holes for 2x 140mm fans on the top exhaust despite it not being mentioned on Fractal’s website. So naturally I just had to replace the 2x NF-S12A 120mm fans with 2x NF-A14 140mm fans. Thankfully Amazon has a generous return policy during the holiday shopping season. I’ve had this new system for barely a month and I thought I’d share all the changes I made since I originally built the system.

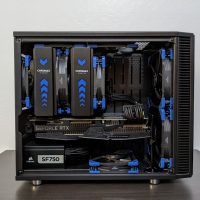
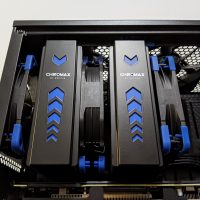
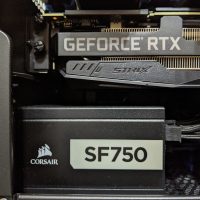
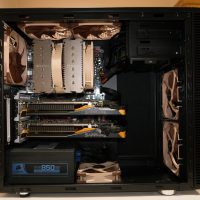
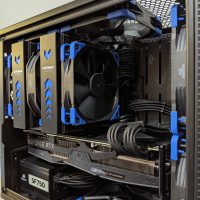
Photo 1: The build as originally completed. I had planned to only use 3 intake fans, 1 exhaust and keep the Moduvent cover on top; however I was surprised by how hot things were during gaming because of the heat from the 2080 Ti (initially on the quiet bios). During gaming my x570 was over 80C, GPU high 70s and my NVMEs got up to 70C. This is the photo I originally used when posting to PCPartPicker.

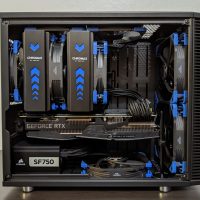
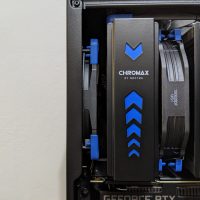
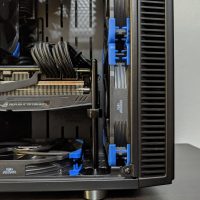
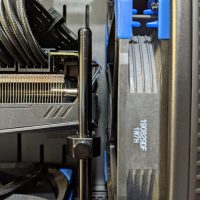
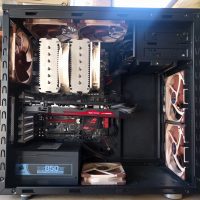
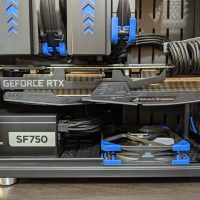
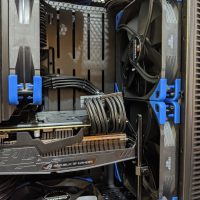
Photo 2: I switched my 2080 Ti to the stock bios which targets 65C for the GPU temp whereas the quiet bios has idle fan stop and targets 75C. This brought down the GPU temps which also brought down my x570/NVME temps during gaming. I found that adding fans on top further dropped the temps by another 5-8C. I also added the GPU brace after receiving some feedback on PCPartPicker as I didn’t really notice the GPU sag at first. This is the photo I used when I shared my build with Reddit.

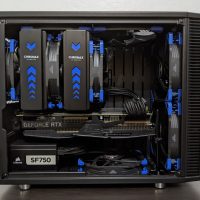
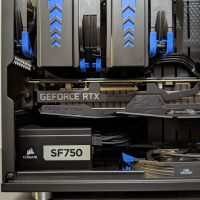
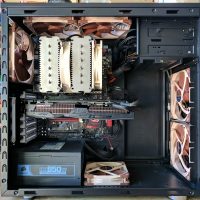
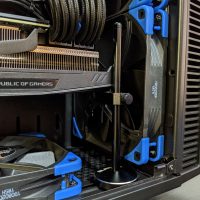
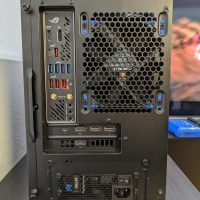
Photo 3: I changed thermal pads on the x570 and I also returned the NF-S12A on the bottom and replaced it with the leftover NF-A15 from NH-D15. I had to take everything apart to do the thermal pad swap and found that I used way too much thermal paste the first time around. I used the spread method the first time but switched to just doing an X pattern. The NH-D15 comes with 2x NH-A15 fans but I had to use an NF-F12 in the front due to clearance issues with the USB 3.0 header and the 24 pin ATX power connector. This is one of the photos from my last post.

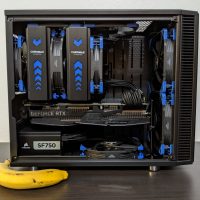
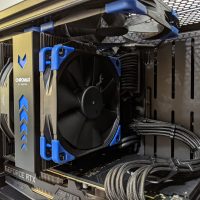
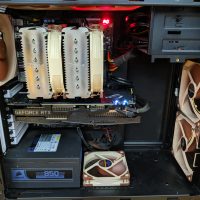
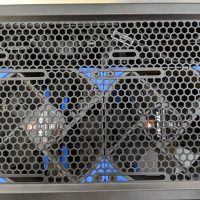
Photo 4: The current configuration with 2x NF-A14s for top exhaust. I currently set all the chassis fans to run at 50% duty cycle which is around 830rpm for the NF-A14s according to HWINFO. I also changed to a manual CPU fan curve that is more linear than stock; min duty cycle 40% at 30C, linear all the way to 100% at 70C. I’ll probably tweak this further to eliminate the subtle ramp ups of the fan during regular use. With the fan changes, thermal pad swap, 2080 Ti on stock bios, and CPU fan curve adjustment, the max tempuratures I’m seeing in HWINFO are much lower than before. The max temps I’m getting now are 75C for the x570, 60C for the NVMEs, and 65C for the 2080 Ti. CPU temps are slightly improved which I suspect is just due to better application of thermal paste. On my early AIDA64 runs, the CPU temp according to Ryzen Master would bounce between 75 and 80C; now it hovers around 75C.

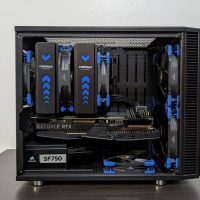
Black X Blue 3950X Final Form

More pictures and changes! I ended up returning bottom the intake NF-S12A fan and swapped it for the extra NF-A15 fan that came with NH-D15. The NF-A15 is a 140mm fan with 120mm mounting holes and performs slightly better than the NF-S12A which is a 120mm fan.

I also ended up trying a thermal pad swap on the Strix x570-I board. My first attempt was with the leftover 2.0mm Thermal Grizzly Minus Pad 8 I used for the rear NVME. This pad was thicker than the stock one and ended up being 1-2C hotter. I later tried a 1.0mm Fujipoly Ultra Extreme XR-m Thermal Pad that appears to be 3-5C cooler than the stock thermal pad.

New Personal Rig Update – AMD Ryzen 9 3950X

I recently finished an all-new build featuring the AMD Ryzen 9 3950X; with the exception of the 2080 Ti, this is my first build in several years that doesn’t use components from previous builds.

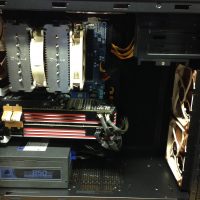
My previous builds have used the Fractal Design Define R4; over the years that case has been home to an Intel i7-930 and i7-4790K. I went through many more GPU changes in the R4: first Radeon 6970 Crossfire, R9 290 Crossfire, Asus Strix 980 Ti, Asus Strix 1080 Ti and finally Asus Strix 2080 Ti.

Finally decided to retire that old R4 case and do an ITX build inside the Fractal Design Define Nano S – essentially a miniature version of the R4. I posted the complete build on pcpartpicker.com a few days ago (I even got featured on the front page!) but the primary specs are as follows:

  • AMD Ryzen 9 3950X
  • Noctua NH-D15 chromax.black
  • 32GB G.Skill Trident Z Neo 16-16-16-36
  • Asus ROG Strix x570-I Gaming
  • Asus ROG Strix 2080 Ti
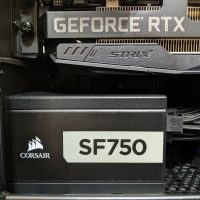
  • Corsair SF750
  • 512GB Samsung 970 Pro
  • 1TB Western Digital SN750

I originally built this without the 2x NF-S12A fans on top for exhaust but found that GPU temps were 5-8C cooler with them in. CPU temps reached 75-80C under 30min of AIDA64 and GPU reached 67-68C after 35 minutes of OCCT. What I found most surprising was NVME temps reached as high as 60C when the 2080 Ti was under load and warming up the case.

The x570 chipset itself idles around 60C and can reach as high as 80C during gaming; fortunately I can’t hear the fan at idle but I can make out the whine of the fan when it gets closer to 80C. I might try replacing the thermal pad with paste or a better thermal pad as others have done on Reddit.
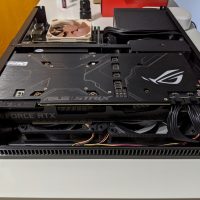
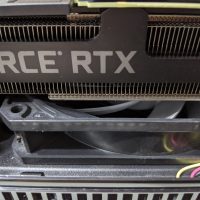
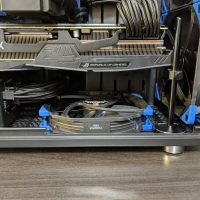
ASUS Strix 2080 in a Node 202

TLDR: Yes, you can put an ASUS Strix 2080 (and likely any other ASUS Strix card) in the Fractal Design Node 202. Check out the gallery below.

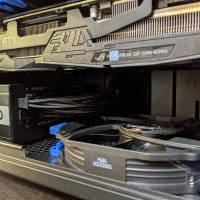
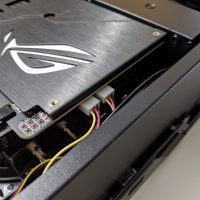
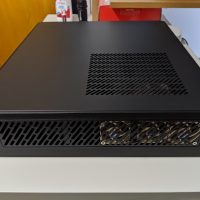
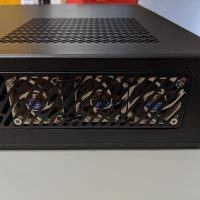
I had to RMA my ASUS Strix 1080 Ti last month; when packing it for shipment I realized it would probably fit inside my Node 202 if I removed the fans and shroud. Thus I decided to upgrade my main PC to an ASUS Strix 2080 Ti and use the replacement card in the Node 202, which ended up being an ASUS Strix 2080. This card is 2.7 slots and larger than the Strix 1080 Ti but I was still able to make it fit inside the Node 202 after removing the fan and shroud. However, there are a few things you should know if you want to try this:

  • The bracket and tabs on the heatsink for the fans and shroud protrude far enough to prevent fans from spinning if you set them up to exhaust from the 202. So you have to set the fans as intakes unless you want to rip off the tabs/bracket and void your warranty.
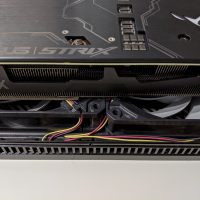
  • One of the 120mm fans must be offset from the other because of the tabs on the heatsink. See Pic #3 below.
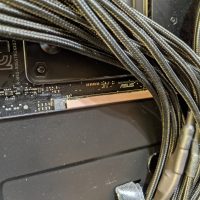
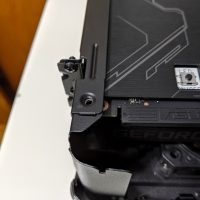
  • One of the screws that secures the GPU bracket to the Node 202 must be removed because it will hit the corner of the Strix PCB. See Pic #4 below.
  • You’ll want the Node 202 in vertical position and use pressure optimized fans to get as much air in as possible.
  • By relying on 2x120mm fans to cool the Strix 2080, you need a way to control them. The Strix 2080 has external fan headers but the software to control them is buggy and requires a workaround.

I am using ASUS GPU TWEAK II to set a custom fan curve on the external fan headers; the very first time the program runs, an executable named ASUSGPUFanServiceEX.exe launches and then closes immediately. This exe is responsible for applying custom fan curves so without it your custom fan curve is not applied. Launching this exe again fixes that problem but also leaves you with a blank command prompt window. To fix this I use Windows Task Scheduler to launch a Visual Basic script at every startup that will run and hide the program:

I haven’t done any rigorous testing but GPU temperatures seem to be decent. I’ve been playing Witcher 3 again at 1800p (custom resolution 3200×1800 with GPU scaling to 4K) on the Ultra Graphics and High Post Processing presets; temperatures generally range from 60C to 70C. My fan curve is set to run at 100% at 70C.

While it can be done, I would not recommend buying an ASUS Strix card if you already have a Node 202. It’s much easier and simpler to just use a 2 slot card. If you want to use the ASUS Strix for a new ITX build, buy a case that can actually hold it like the Cerberus or a Define Nano S with an SFX power supply.