All posts by Humajum

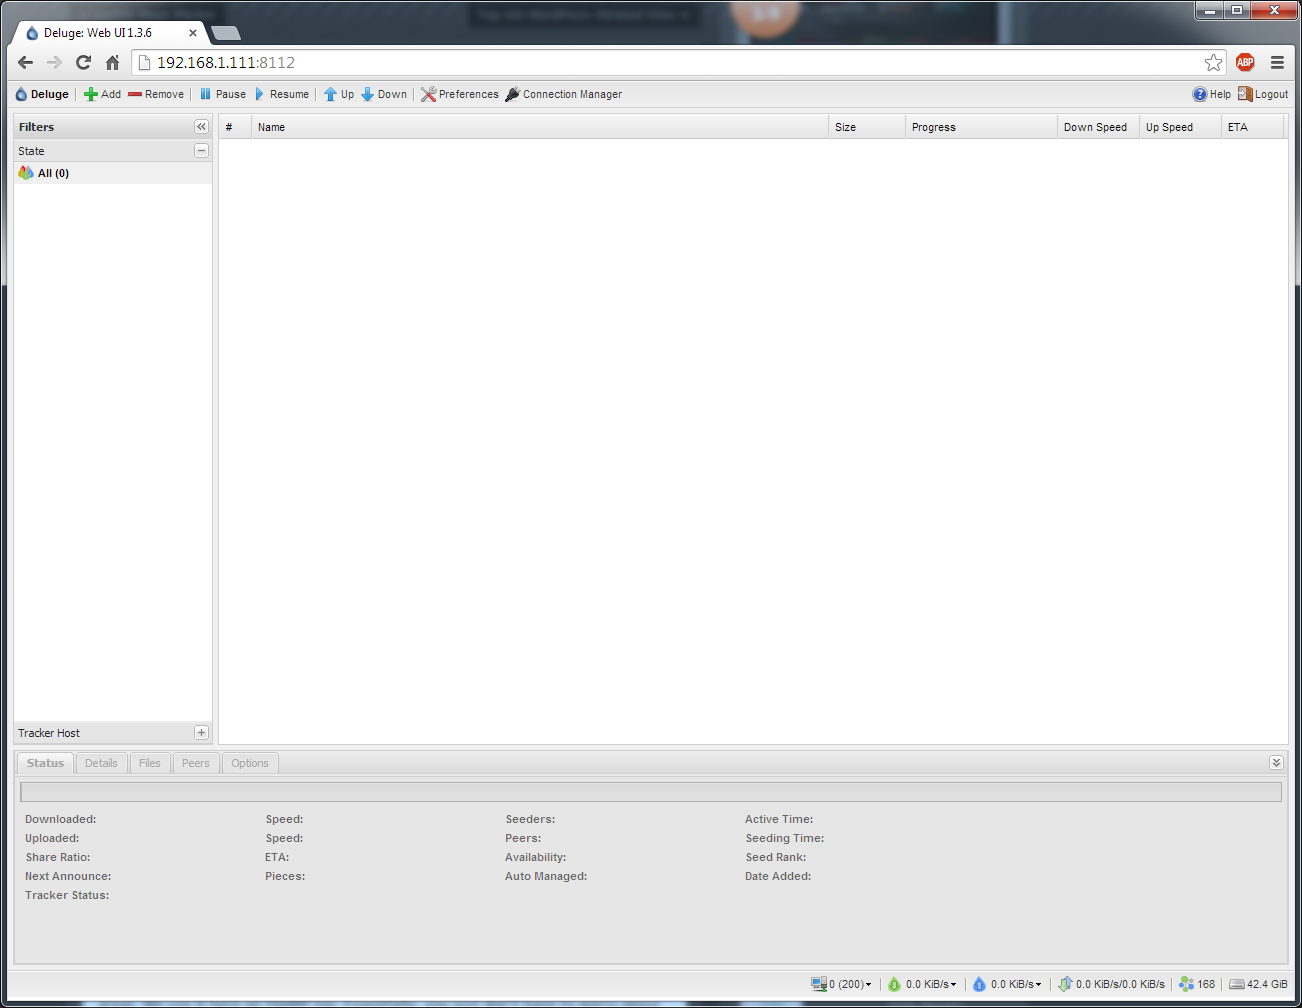
Deluge 1.3.6 Seedbox on CentOS 6.5

I’ve recently been experimenting with using a seedbox; I built one using CentOS 6.5 and Deluge. The original guide I followed used a repo that only had Deluge 1.3.5 and later through some googling I found a repo for installing 1.3.6.

First add the repo for Deluge 1.3.6:

Add the following lines:

I also needed the repo for the geoip package which is required for deluge; my CentOS install at home needed it but a CentOS cloud server I tried didn’t:

Now we can install geoip and deluge:

Create a user to run deluge:

Set deluge daemon and webui to start automatically:

Add the following lines:

Now deluge will automatically start and run under seedbox user. Don’t forget to add rules to iptables for port 8112 which is the default port for the deluge webui.

deluge_webui

Iptables and Fail2ban Duplicate Rules

For a while I always wondered why fail2ban sometimes put in the same rule twice under iptables:

It turns out that when fail2ban service starts, it inserts the fail2ban-ssh rule at the top of your iptables rules; so if you did save of your iptable rules with the fail2ban-ssh rule already inserted, iptables loads its default rules (with fail2ban-ssh in it) and then fail2ban adds it again when it starts.

To fix this, I deleted the fail2ban-ssh rules from iptables and saved those rules; now when my server boots iptables loads without the fail2ban-ssh rule and fail2ban adds it when it starts.

Hackintosh Build Update and Gallery

It’s been over a week since getting my Hackintosh up and running; ever since downgrading to v2.4.14 of the AppleIntelE1000e kext I haven’t had any issues. Everything works and it feels like a real Mac.

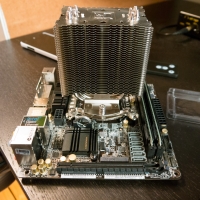
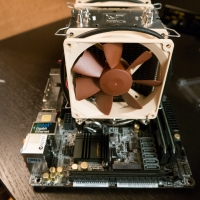
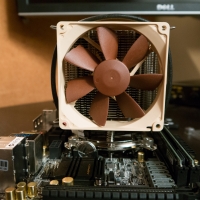
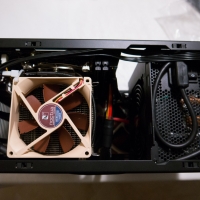
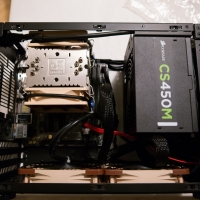
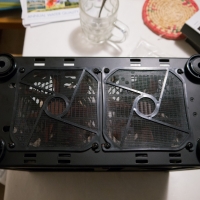
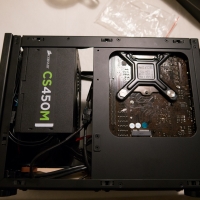
Below are some pictures of my build; I installed a Noctua NH-U9B SE2 for as CPU cooler and added a pair of Noctua NF-S12A PWM fans at the bottom. Everything is arranged to blow up from the bottom. The NF-S12As are controlled by PWM and set to ~900 RPM; unfortunately the Z87E-ITX doesn’t appear to support voltage based controls for 3 pin fans attached to the CPU fan header. I set the CPU fan to run at full speed and used the low noise adapter to lower the CPU fans to ~1100 RPM.

My Experience with Hackintosh (ASRock Z87E-ITX and OS X 10.9.3)

My early 2009 Mac mini had recently died and I decided to try building a Hackintosh to replace it instead of buying a new Mac mini. The current Mac minis have not been refreshed since 2012 and are still using Ivy Bridge CPUs.

I had an NCASE M1 that had been sitting in my closet for the past six months so it seemed like a good time to finally put it to use. I was originally going to use a Gigabyte H87N-WIFI or Z87N-WIFI board based on the recommendations from TonyMacx86’s Buying Guides but a friend of mine had an ASRock Z87E-ITX he was not using; I went with that board instead to keep the build cost low.

The build components are:

  • Intel Core i5-4440S
  • ASRock Z87E-ITX
  • Crucial Ballistix Sport 8GB (2 x 4GB) DDR3 1600 Low Profile
  • Intel X-25M 120GB SSD (taken from my dead Mac mini)
  • Slim slot loading ODD (also from my dead Mac mini)
  • Corsair CS450M 80 PLUS Gold PSU
  • NCASE M1

While waiting for parts to arrive,  I prepared the installer using my Macbook Pro by following the instructions at http://www.tonymacx86.com/374-unibeast-install-os-x-mavericks-any-supported-intel-based-pc.html. Since I was downloading Mavericks from fresh the App Store to make the Unibeast installer, it was already updated to 10.9.3 – so I didn’t need to update after getting my Hackintosh up and running.

After receiving all of the components,  the first thing I did was flash the BIOS of the Z87E-ITX using a beta bios found at http://www.tonymacx86.com/general-hardware-discussion/117344-z87e-itx-updates-15.html#post762323 – looking through that thread you will see user WonkeyDonkey has done most of the work in figuring out how to hackintosh the Z87E-ITX.

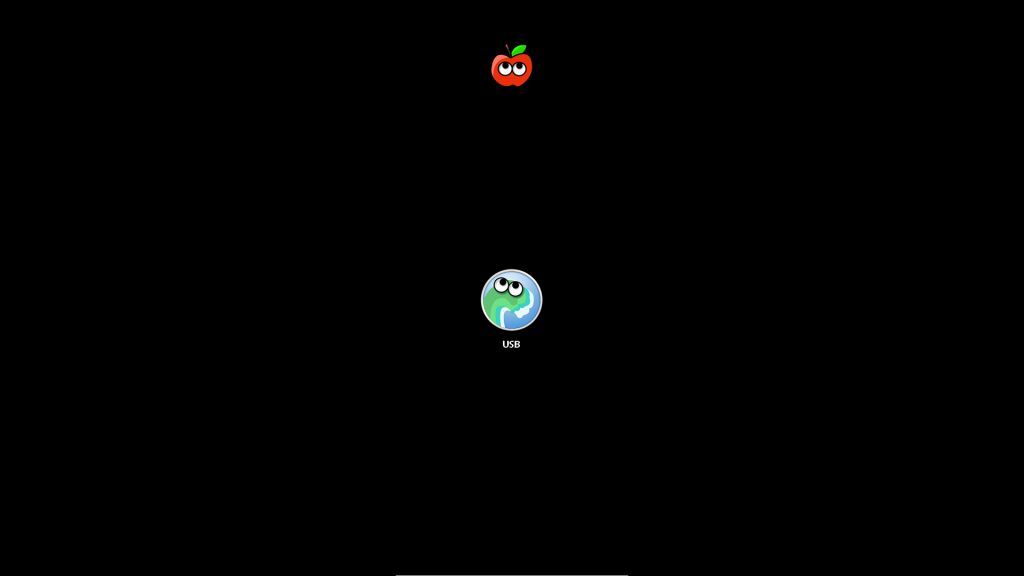
Now I was ready to try installing Mavericks. I had my monitor connected to the ASRock via Displayport; I found that after the BIOS screen that Unibeast installer screen was just black. Normally you would see something like this:
usb

This is the screen where you press Enter to boot from USB or type in other boot parameters if you have issues reaching the installation. I also tried connecting the monitor via DVI and HDMI; both of those connections allowed me to see the Unibeast installer but would kernel panic every time despite the boot flags I tried. I left the monitor connected via Displayport and despite not being able to see anything I was still able to just hit Enter at the black screen and proceed to the Mavericks install. After completing the Mavericks install, I found that I could not boot off the installation using the Unibeast USB stick; I got a kernel panic every time (it was also tricky trying to select the install and type boot flags since the screen was completely black). Eventually it dawned on me that there was something different about the Unibeast USB environment and the new install of Mavericks sitting on my SSD; Unibeast has an Extra folder under / which contains kexts that are needed for it to boot properly on most systems in order for you to run the install. So I decided to try making the Extra folder on the Mavericks installation and copy over some of the files:

After doing this I could finally boot from the Mavericks installation and run Multibeast with the following settings:
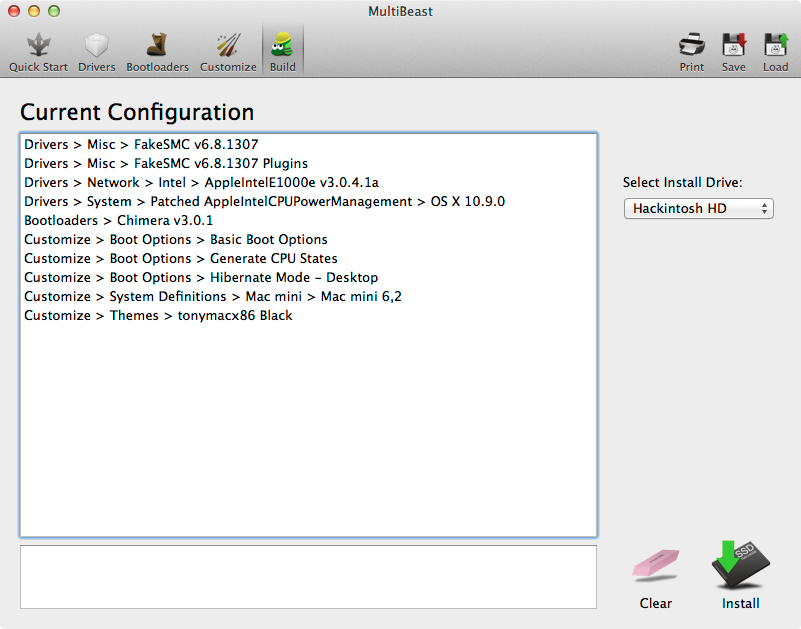
multibeast1

I removed my Unibeast USB and restarted Hackintosh;  it booted correctly from the SSD and the boot loader was no longer showing a black screen. Everything seemed to work pretty well and I started reinstalling my apps. Then I realized I didn’t set up the audio. Unfortunately I’m not sure exactly how I got the audio working. I forgot to install the ALC1150 kext during the first run of Multibeast; I opened it again and chose just the ALC1150 and “Optional EFI Installed Bootloader Support”. After the reboot the audio was still not working. Then I tried running Multibeast again with ALC1150 and the DSDT.AML that is included in the zip with the 2.30A bios from the post I mentioned earlier. This just made my Hackintosh freeze at the Apple logo so I had to boot from Unibeast USB and use the Terminal to delete DSDT.AML from my /Extra folder. After doing this and booting into Mavericks again I found that the audio was working perfectly. Weird.

So far it appears to be stable and everything I have tested works: Bluetooth pairing with Apple Wireless Keyboard and Apple Magic Trackpad, ethernet, audio, hardware monitoring via iStat Menus, Intel SpeedStep and even Sleep (although it seems it will not wake up via Bluetooth, need to push power button to wake it up).

EDIT:   My Hackintosh appears to hang during heavy network loads and it appears the version of AppleIntelE1000e I used is unstable (see http://blog.thireus.com/tag/appleintele1000e-kext). I’ve installed v2.4.14 instead and it seems to be ok.
How to Update Unlicensed XenServer 6.2.0

Since XenServer 6.2.0, Citrix has made all of the features available for free; however to receive support one must purchase a license. I was always under the impression you could not update XenServer 6.2.0 because it is always disabled through XenCenter but today I found out you can just apply the updates manually.

Copy the update files to your XenServer via your preferred method or use wget to download them directly. Next run the following command:

After this command finishes, it will output the uuid of the patch you just uploaded; on my system I could just tab complete the uuids in the next command:

Reboot your XenServer and the patching is complete.

How to Run Fsck on Synology DS1511+ (DSM 5.0)

After doing some research on Google, I finally figured out how to run fsck on my Synology DS1511+ using a combination of guides I found.

First I needed to install ipkg so that I could later use lsof to tell me what processes were using the volumes that needed to be unmounted before running a file system check; I did this by following the guide at http://www.peppercrew.nl/index.php/2012/04/how-to-install-ipkg-on-synology-nas-ds212/. The DS1511+ uses an Intel Atom so I downloaded the syno-i686-bootstrap_1.2-7_i686.xsh bootstrap. The guide says to comment out some lines in /root/.profile for DSM 4.0 only but I found that this was also necessary for DSM 5.0; without it the DS1511+ complained that ipkg could not be found.

Afterwards I installed lsof by running:

Now I was ready to use the guide at http://www.cyberciti.biz/faq/synology-complete-fsck-file-system-check-command/. I had to deviate from this guide a bit at the step where it tells you to stop the pgsql service by entering:

This script did not exist on my DS1511+ so I had to google another way to stop it. Some guides I had found said to run:

However that command gave me an error:

I figured out that the postmaster.pid file was owned by user postgres so I ran:

This command worked and I was able to use the rest of the guide to run a file system check on my Synology.

Compiling RocketRaid 3510 driver for XenServer 6.2

A while ago I decided to convert one of my workstations into a hypervisor so I could run VMs entirely separate from my main desktop. The specs on this machine are:

  • Intel Core i7-950
  • Asus Maximus Gene III
  • 6x2GB Corsair 1600 DDR-3 CAS9
  • 1GB Radeon 5450
  • 120GB Intel 320
  • HighPoint RocketRAID 3510 running 3x500GB WD RE3 drives in RAID5
  • Cosair VX550 PSU
  • Corsair H70 with Scythe GT fans
  • Antec Mini P180

I wanted to try VMware ESXi but there’s no driver support for the RocketRAID 3510 and I didn’t feel like purchasing a supported raid card. I tried Hyper-V Server 2012 R2 for a bit since it can load normal Windows drivers; I was able to get the RocketRAID recognized easily. Too bad I could never figure out how to get the management console on my workstation to connect properly (access denied every time). I went back to XenServer (which I used extensively at work) and after lots of Google, managed to figure out how to compile a custom driver for the RocketRAID 3510.

Most of this information came from a now defunct blog which is my motivation for creating this post and this blog; to make sure important information doesn’t get lost.

First you need to download and import the “DDK (Driver Development Kit) 6.2.0” VM appliance from Citrix. This appliance will be used to download and compile the drivers.

At the terminal on the DDK VM run:

Next we extract the source code:

Go into the newly extracted folder:

Compile the driver:

Now we need to copy the hptiop.ko kernel driver to our XenServer:

Now at the terminal on our XenServer we install the driver:

Now we have compiled and installed a driver for the RocketRAID 3510 but we still need to create the storage repository manually; I used the KB article from Citrix to do that – http://support.citrix.com/article/CTX121313

Create USB Installer for Windows 7

Sometimes I don’t remember all the commands for creating a USB installer for Windows 7; most of the time I google “ars technica usb install” to look at their great article. But here are the commands I like to use (slight variation from Ars Technica):

Open a command prompt window as administrator:

Now you can copy the contents of your Windows ISO to your flash drive and boot from it to install Windows.