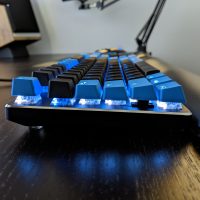
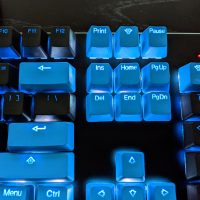
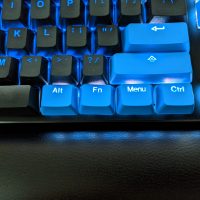
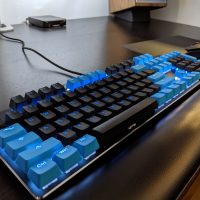
Glorious GMMK Full Size with Tai-Hao Keycaps and Kailh Box Navy Switches

My main keyboard since 2012 has been the Ducky Shine 2 with Green LEDs and Cherry MX Blues. During the holidays I ordered some switch testers from Amazon to play around with and my favorite switch was the Kailh Box Navy. This is a very loud tactile switch with a very heavy spring; it took some getting used to compared to my old Cherry MX Blues. It’s definitely not a switch for everyone and some may find it too tiring due to the amount of force required to activate each switch.

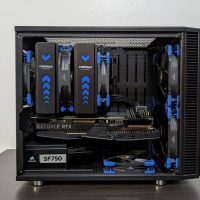
Since I had recently completed my Black x Blue 3950x, I wanted a new keyboard to try and match the same color scheme. I ended up buying the Glorious GMMK Full Size as it seems to be the cheapest option with all of the features I wanted: RGB backlighting, hotswappable switches, full size and can be purchased without keycaps or switches. I ordered Kailh Box Navy switches separately from Novelkeys and a Tai-Hao black/blue PBT backlit keycap set from MechanicalKeyboards.

The Tai-Hao keycap set I bought has a rough matte texture that feels nice (to me) and is the only set I could find that was PBT, backlit and came in two colors (black/blue). Unfortunately the blue on this keycap set doesn’t match the blue on my Noctua Chromax fans but still looks pretty good. The only negative thing about this keycap set is the quality control; some of the keys are slightly off and some are very obviously crooked like the DEL and FN keycaps. I tried changing the switches under them but it appears to be a defect in the keycap alignment rather than the switch stem.

I’ve read mixed things about Glorious’s customer service but personally can only report a positive experience. I ordered my GMMK a few days before their end of year sale; I contacted support and they refunded me the difference (10%). The first GMMK I received was damaged in shipping (warped case); they sent me a replacement unit free of charge and didn’t even ask me to ship the old one back.

Overall I would say the GMMK is a good starter keyboard; experienced users will see the GMMK as a glorified switch tester. It doesn’t have the same build quality or heft to it as my Ducky Shine 2 or Vortex Pok3r RGB; bottoming out on some of the keys sounds a bit hollow on the GMMK as well. My next keyboard will probably be the Drop Shift or I will just build a custom YMDK96 from scratch. If you are shopping for your first mechanical keyboard, I recommend buying a switch tester to get an idea of what switch you like then getting the GMMK in the size you prefer.

Black X Blue 3950X – Final Final Form and Revision History

About a week ago I finally noticed the Define Nano S actually has mounting holes for 2x 140mm fans on the top exhaust despite it not being mentioned on Fractal’s website. So naturally I just had to replace the 2x NF-S12A 120mm fans with 2x NF-A14 140mm fans. Thankfully Amazon has a generous return policy during the holiday shopping season. I’ve had this new system for barely a month and I thought I’d share all the changes I made since I originally built the system.

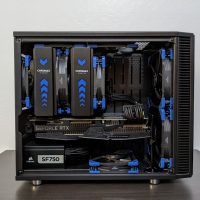
Photo 1: The build as originally completed. I had planned to only use 3 intake fans, 1 exhaust and keep the Moduvent cover on top; however I was surprised by how hot things were during gaming because of the heat from the 2080 Ti (initially on the quiet bios). During gaming my x570 was over 80C, GPU high 70s and my NVMEs got up to 70C. This is the photo I originally used when posting to PCPartPicker.

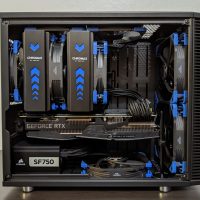
Photo 2: I switched my 2080 Ti to the stock bios which targets 65C for the GPU temp whereas the quiet bios has idle fan stop and targets 75C. This brought down the GPU temps which also brought down my x570/NVME temps during gaming. I found that adding fans on top further dropped the temps by another 5-8C. I also added the GPU brace after receiving some feedback on PCPartPicker as I didn’t really notice the GPU sag at first. This is the photo I used when I shared my build with Reddit.

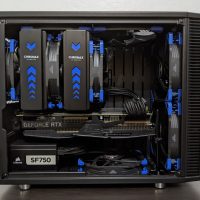
Photo 3: I changed thermal pads on the x570 and I also returned the NF-S12A on the bottom and replaced it with the leftover NF-A15 from NH-D15. I had to take everything apart to do the thermal pad swap and found that I used way too much thermal paste the first time around. I used the spread method the first time but switched to just doing an X pattern. The NH-D15 comes with 2x NH-A15 fans but I had to use an NF-F12 in the front due to clearance issues with the USB 3.0 header and the 24 pin ATX power connector. This is one of the photos from my last post.

Photo 4: The current configuration with 2x NF-A14s for top exhaust. I currently set all the chassis fans to run at 50% duty cycle which is around 830rpm for the NF-A14s according to HWINFO. I also changed to a manual CPU fan curve that is more linear than stock; min duty cycle 40% at 30C, linear all the way to 100% at 70C. I’ll probably tweak this further to eliminate the subtle ramp ups of the fan during regular use. With the fan changes, thermal pad swap, 2080 Ti on stock bios, and CPU fan curve adjustment, the max tempuratures I’m seeing in HWINFO are much lower than before. The max temps I’m getting now are 75C for the x570, 60C for the NVMEs, and 65C for the 2080 Ti. CPU temps are slightly improved which I suspect is just due to better application of thermal paste. On my early AIDA64 runs, the CPU temp according to Ryzen Master would bounce between 75 and 80C; now it hovers around 75C.